Teams & Administration
The admin surface of OpsPing: who's in the workspace, what they can touch, which tools can push alerts in, and the records that prove what happened. Everything in this guide assumes the admin role unless noted.
- An account with the admin role.
- The core product running: alerts, schedules, and channels per the earlier guides.
-
Group people into teams
Teams group users for schedules, escalation policies, and access scoping. Create one per on-call group — Platform, Payments, Support — and add members. A user can belong to more than one team, and teams are the unit schedules and escalation rules most often target.
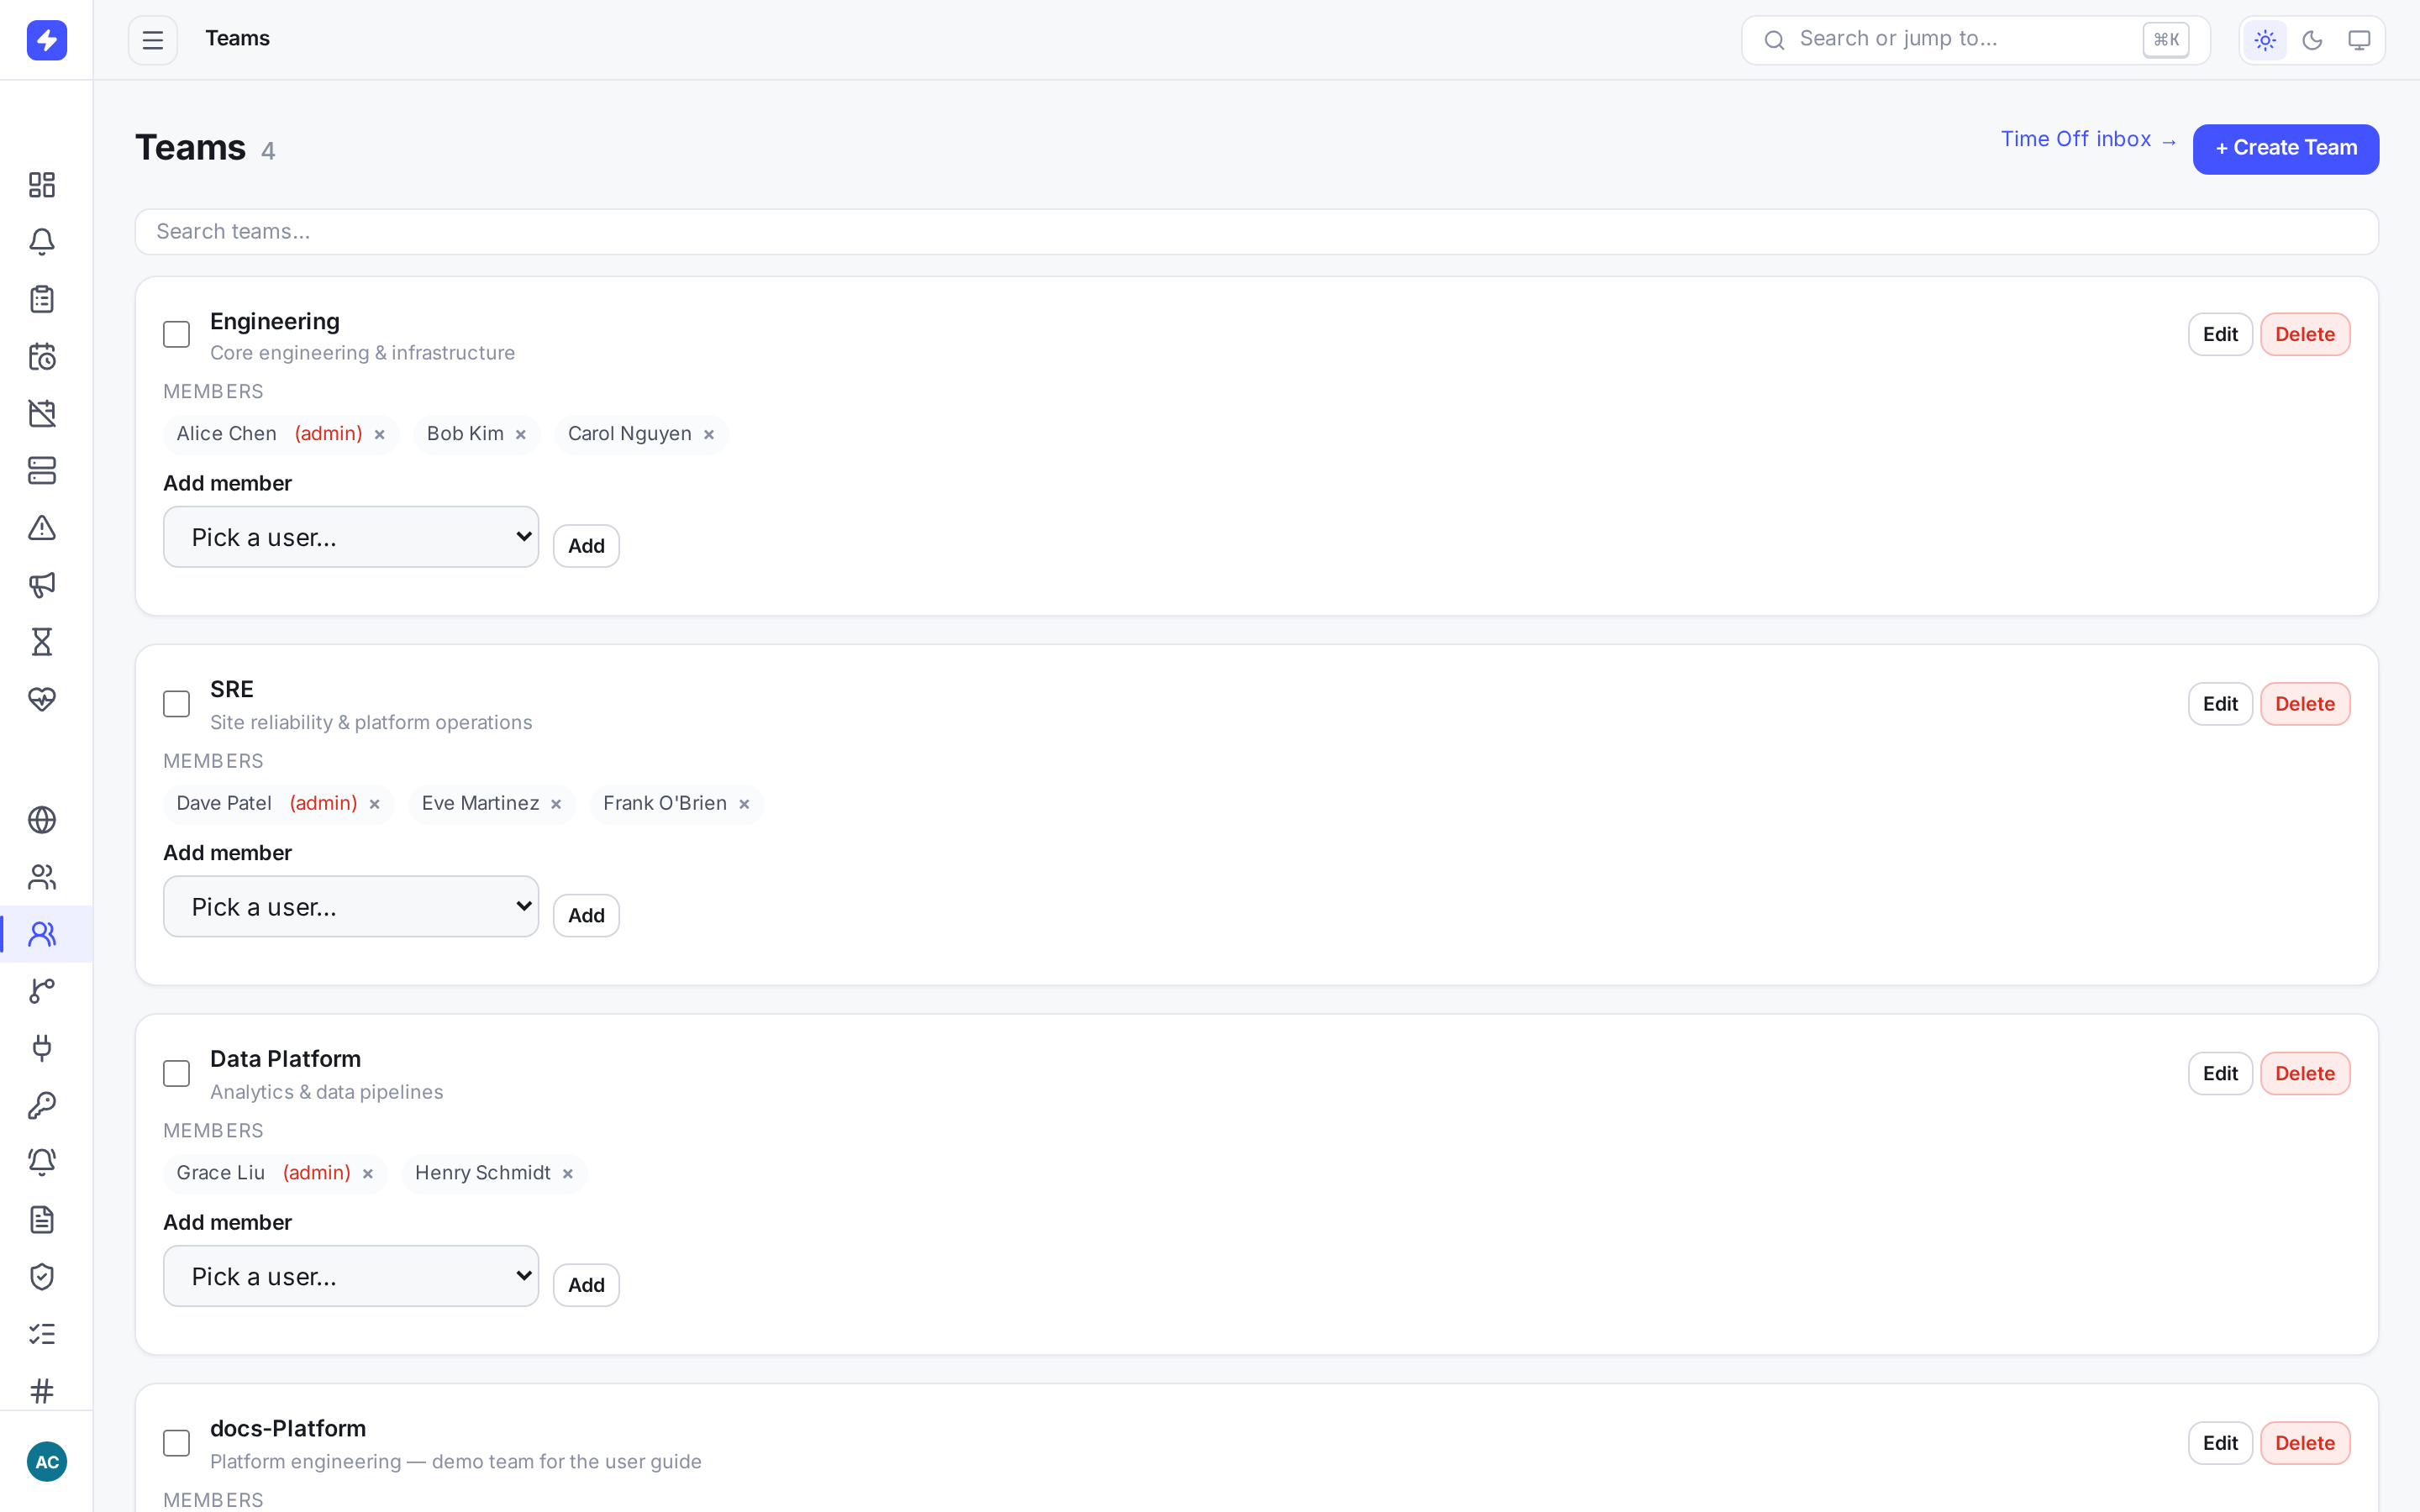
Teams group responders for schedules, escalation policies, and access scoping. -
Add users and send invites
The Users page lists everyone with their role, plus shortcuts to their notification setup and account controls. Admins can add a user inline — name, email, temporary password — or send an invite by email and let the person set their own password on first sign-in. Inline-added users start in the user role; change it afterwards with the Role action.
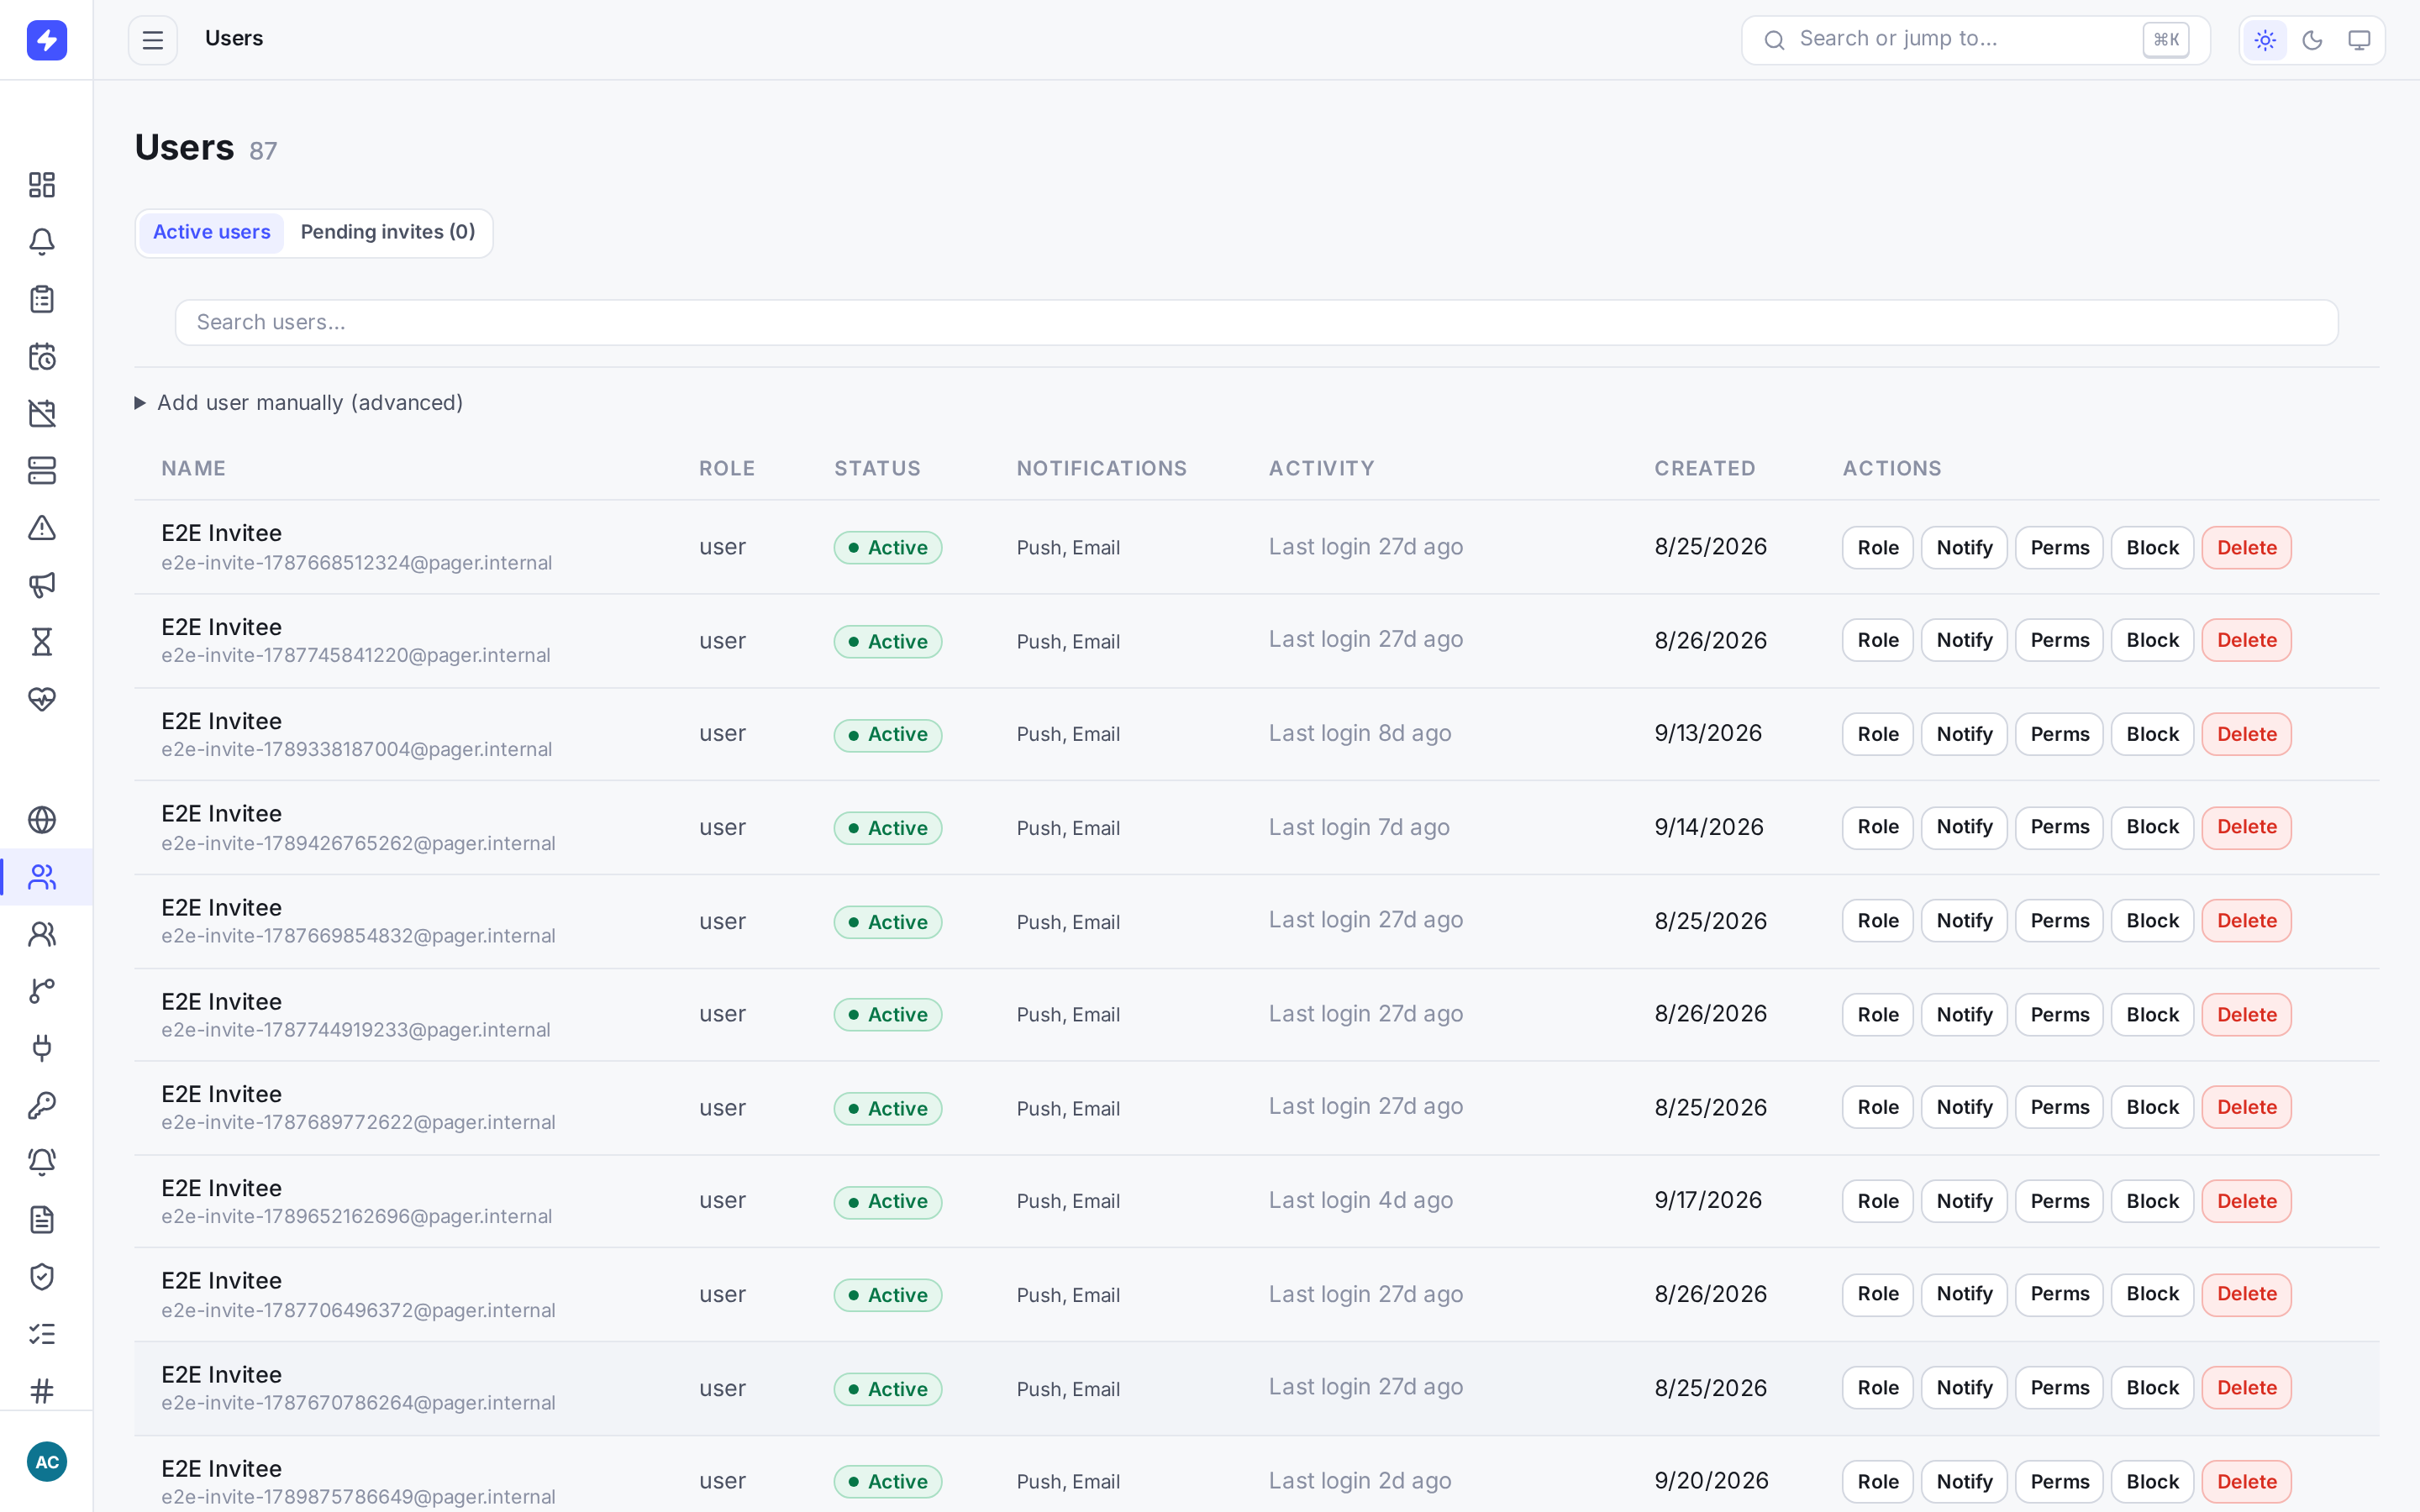
The users list with roles, notification shortcuts, and account controls. Admins can add users inline or send invites. Open a user for profile, notification preferences, memberships, and schedules. Channels and notification rules are visible there only for your own profile; an admin viewing another user does not see that person's private channel/rule configuration.
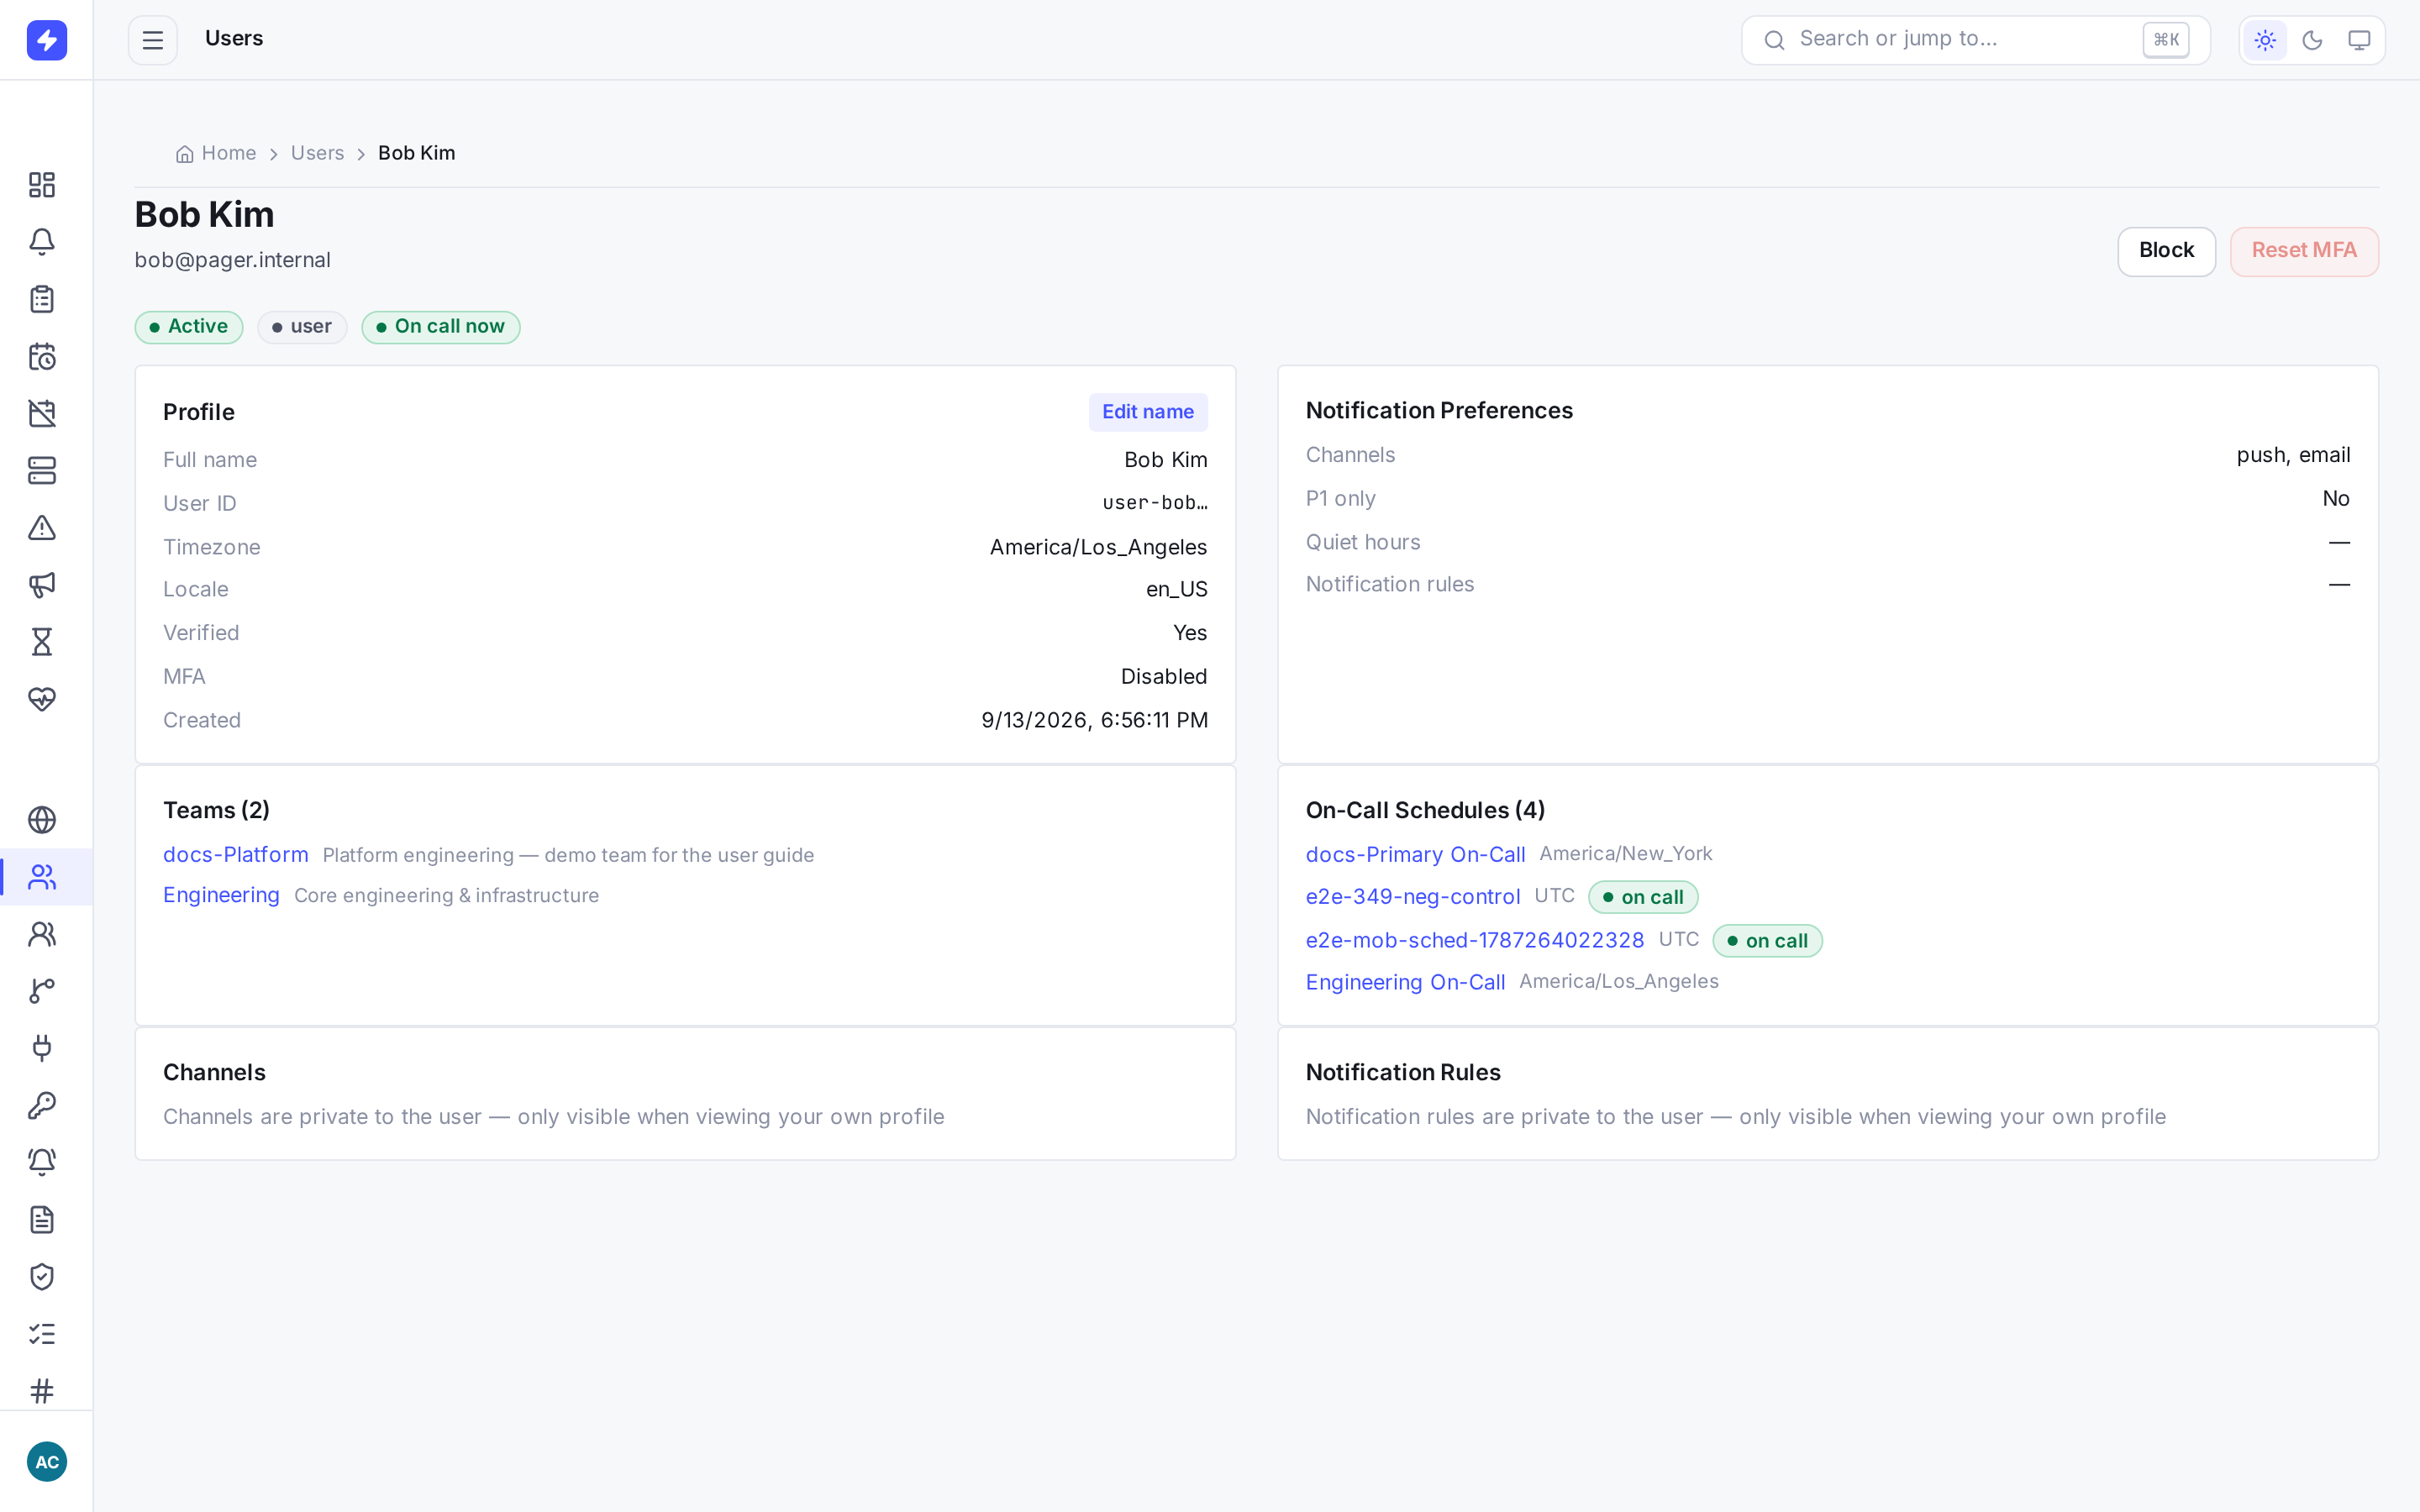
User detail centralizes identity, access, and schedule context. Private channel and rule configuration stays with its owner. -
Assign roles and custom permissions
Every user has a role that sets their ceiling:
- Admin — tenant-wide administration plus responder actions across teams.
- Team manager — responder access plus management of their team's resources, including teams, escalation policies, and services, without tenant-wide admin access.
- User — responder access within team scope.
- Stakeholder — the non-paging tier: service health, incidents, maintenance, and announcements from mobile Status.
Custom team roles and role-based access control (RBAC) are available on the Business plan only. A per-user permission matrix can grant resource-specific access beyond the role preset. Role and permission changes invalidate the user's existing access and refresh tokens; they must sign in again.
-
Block accounts and reset MFA
Block and unblock are available from the users list and detail page. Blocking invalidates current sessions; unblocking lets the user sign in again with the existing password.
Open user detail for Reset MFA. It clears the factor and backup codes and signs the user out of every session, after which they can sign in and enroll again.
NoteThese security-sensitive changes write audit entries. They do not preserve an old authenticated session.
-
Set up two-factor authentication on your own account
To protect your own account, go to Settings → Security → Set up MFA, then complete authenticator enrollment on the MFA page.
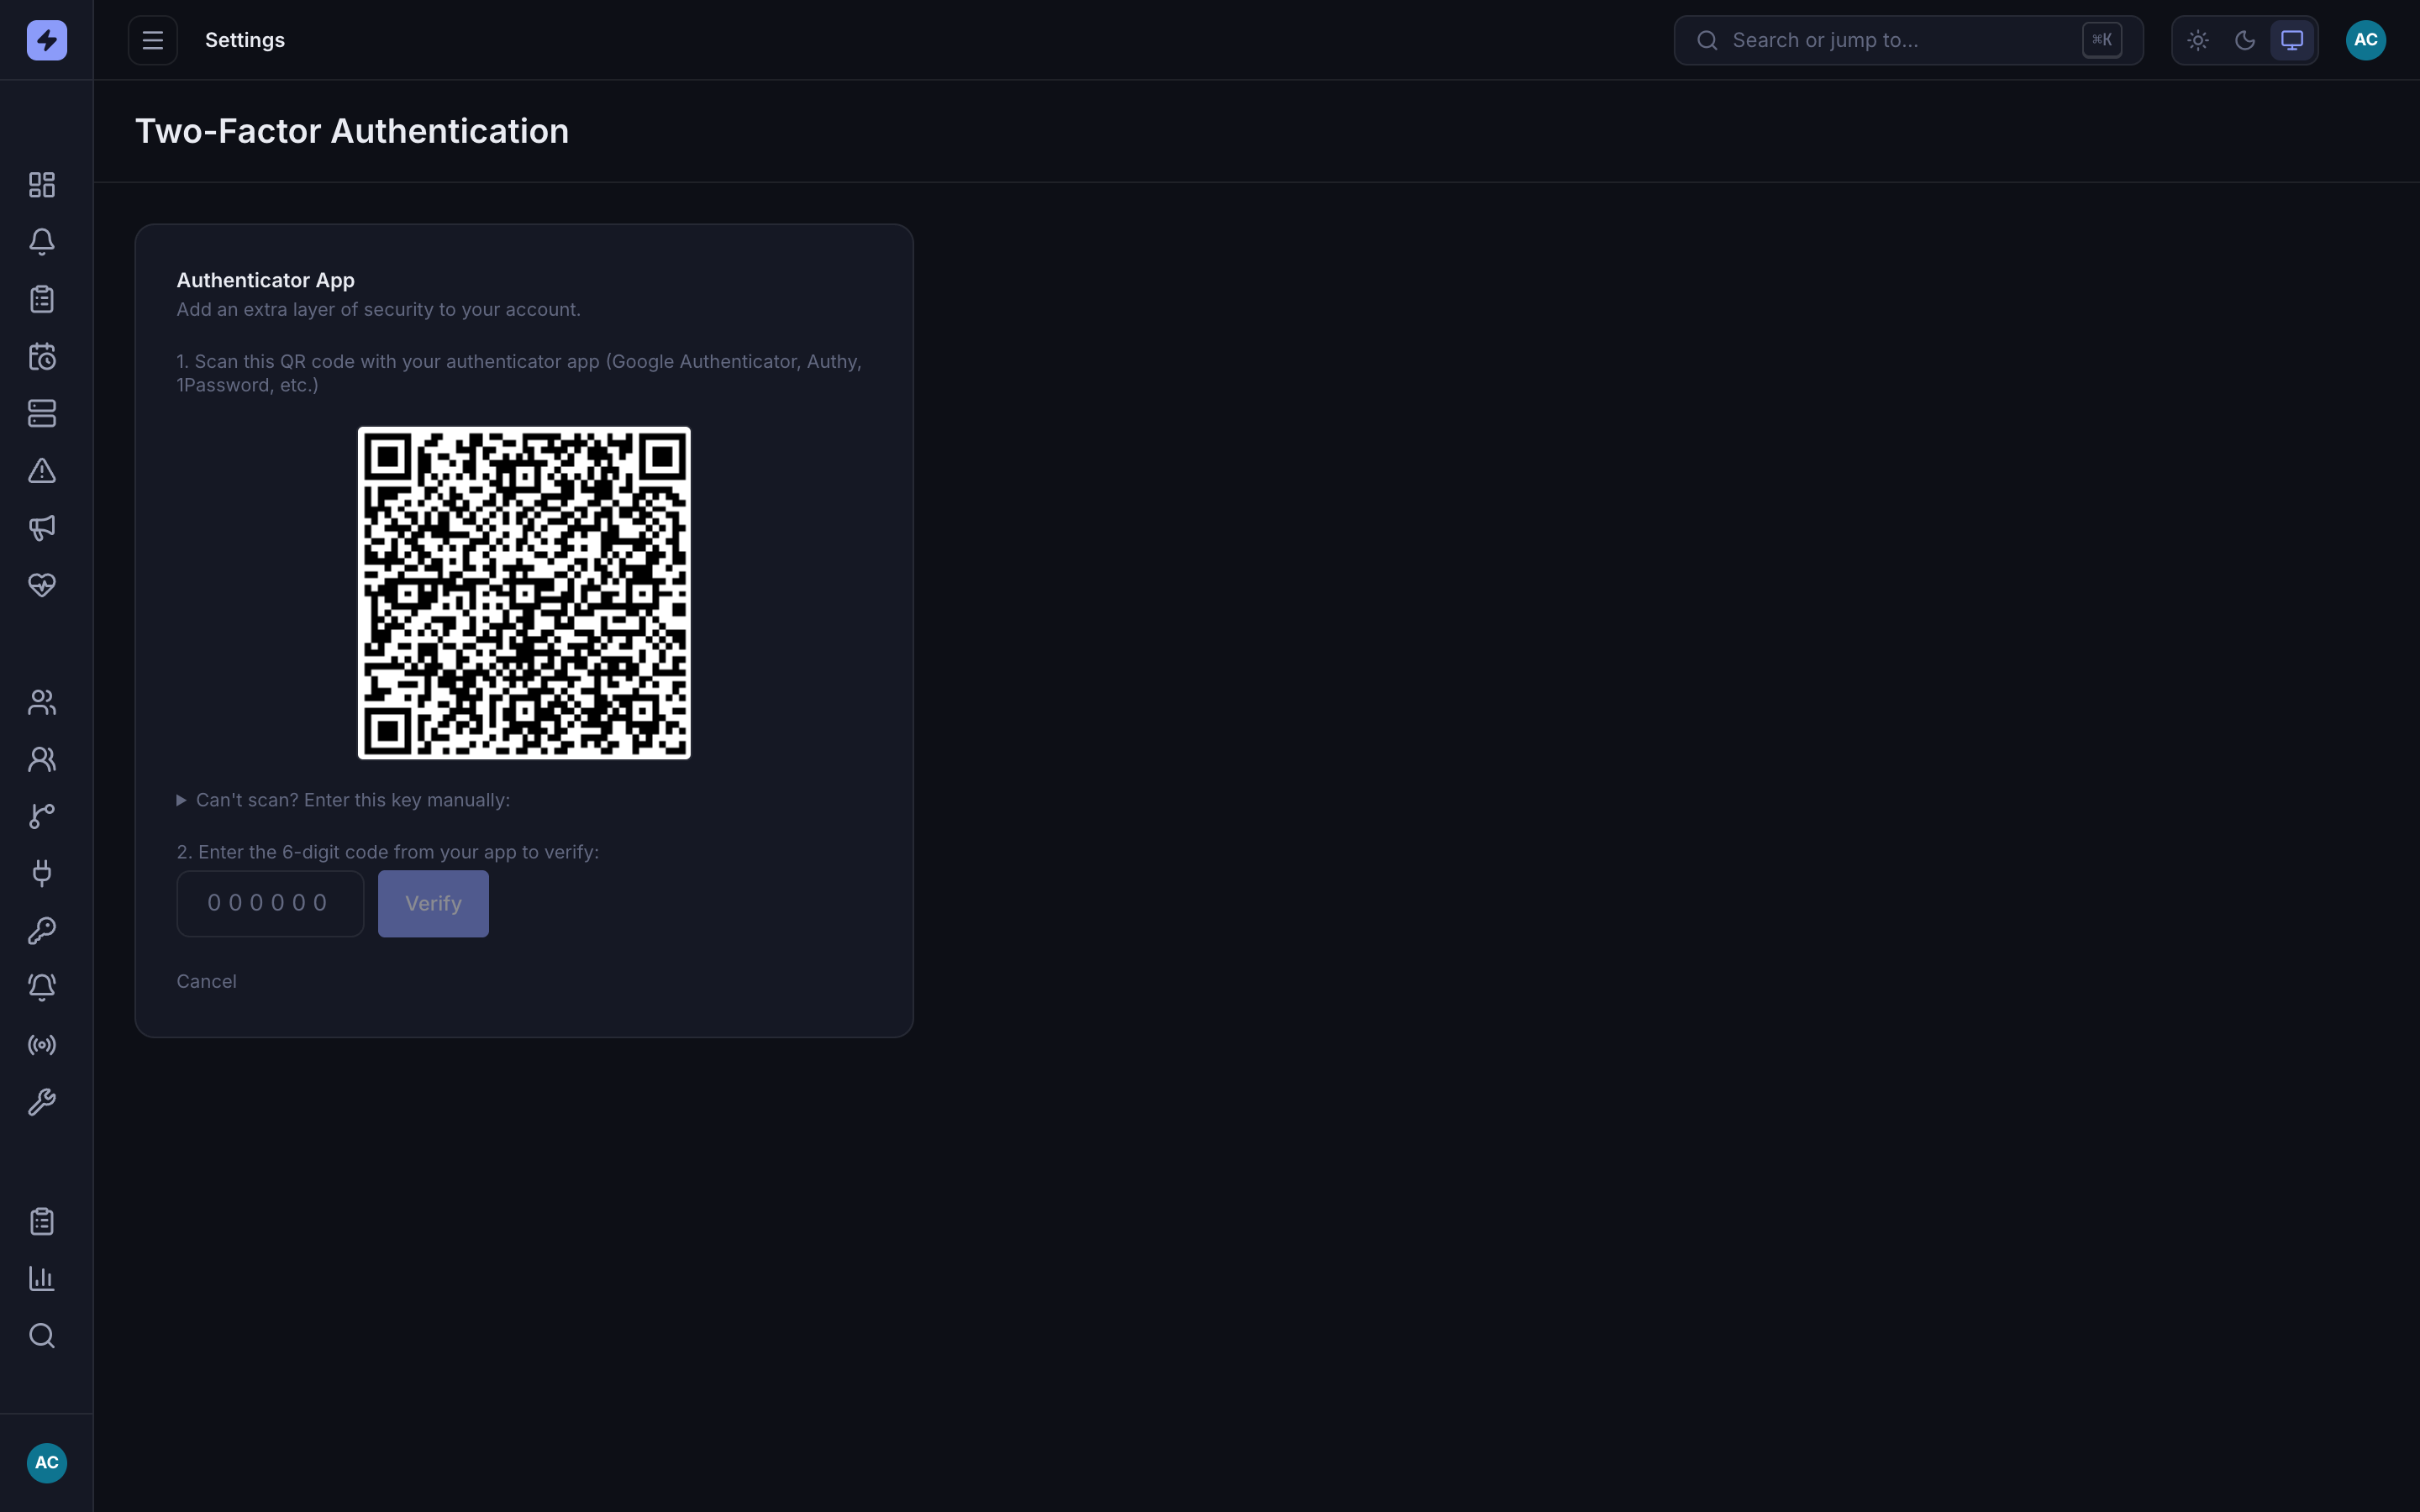
Enrolling your own MFA: scan the QR code with an authenticator app (Google Authenticator, Authy, 1Password), or enter the key manually, then type the 6-digit code to verify. Scan the QR (or paste the manual key) into your authenticator app, then enter the 6-digit code to confirm. After verification OpsPing shows a set of backup codes — save them somewhere safe. They're your way back in if you lose the phone; an admin MFA reset is the fallback.
-
Connect tools with integrations and API keys
Integrations issue API keys with read, write, delete, and config scopes. Write covers alert creation and actions such as acknowledge and close; delete governs permanent deletion. The scopes do not offer create-only versus close-only separation.
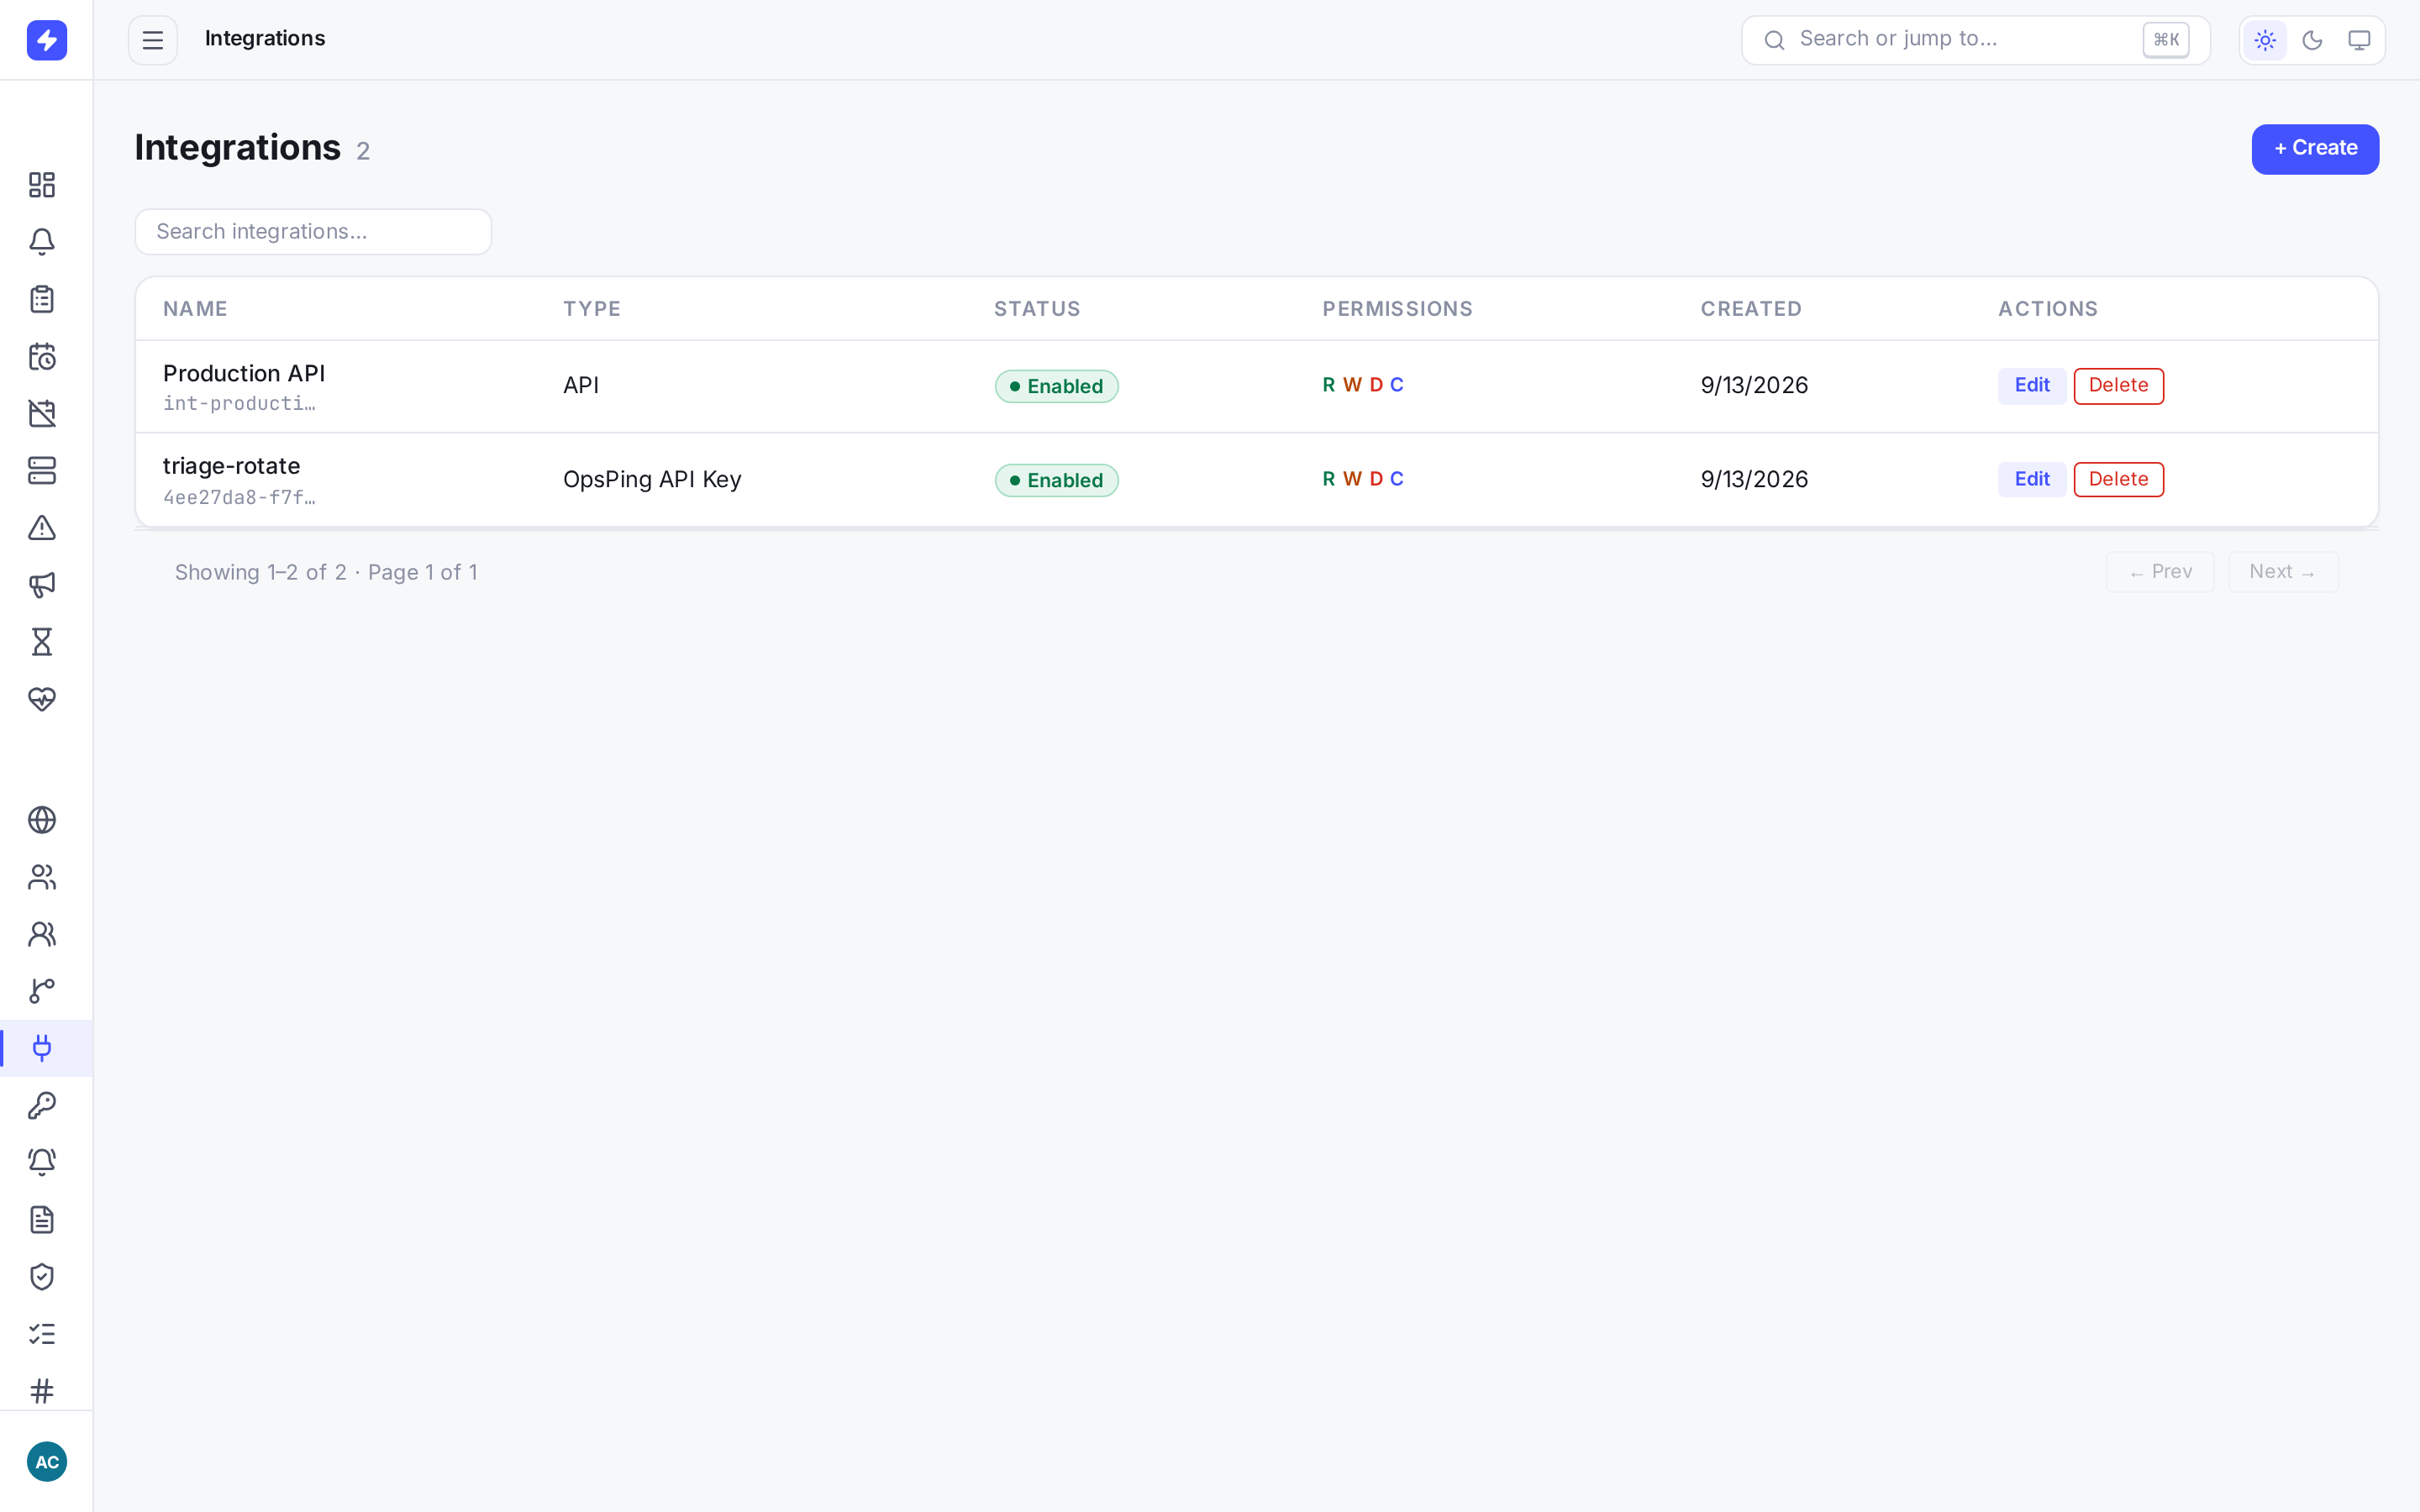
Integrations issue API keys for inbound alert creation from your monitoring tools, with per-key read/write/delete/config scopes. Creating an integration shows the generated key exactly once — copy it into your secrets manager before closing the dialog. Losing it means regenerating, which kills the old key immediately.
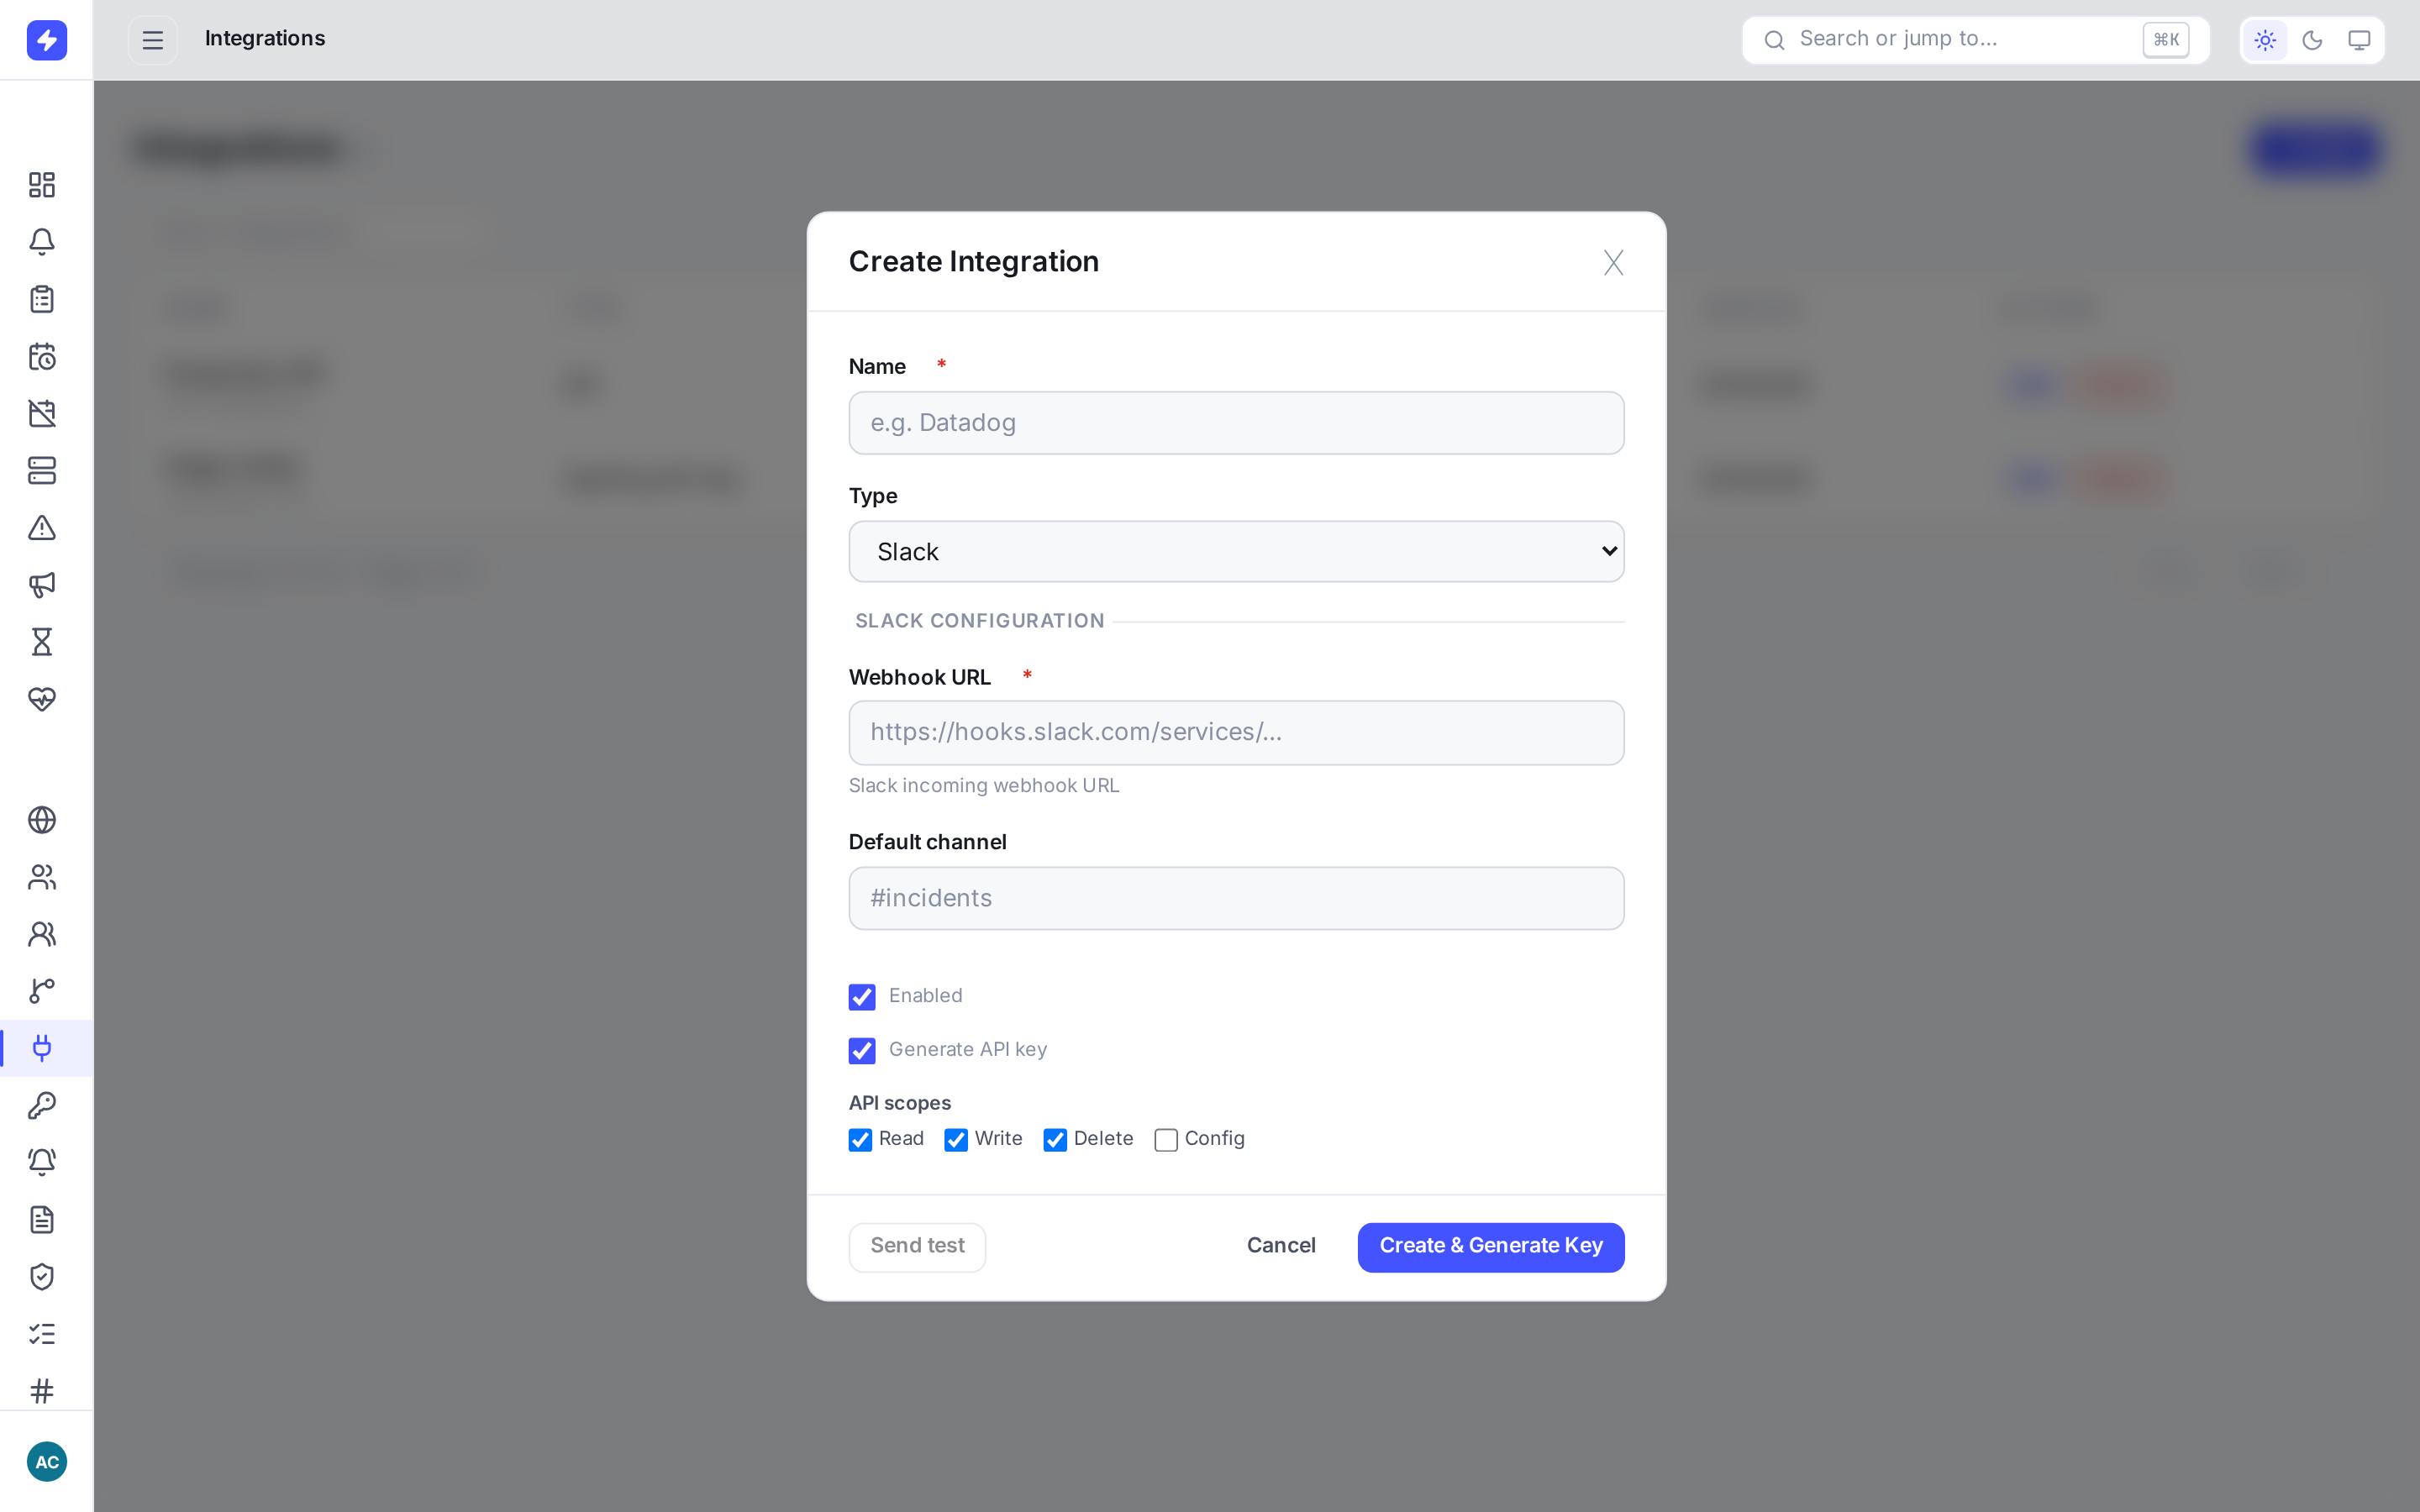
A source dedicated to one service can link that default so mapped alerts inherit the service and its application icon. TipOne integration per tool per environment (
prometheus-prod,prometheus-staging) beats one shared key for everything: you can revoke a noisy source without taking the rest of your monitoring down with it. -
Answer "who did what" with the audit log
The audit log records supported security and operational events, including alert actions, role/permission/block changes, MFA resets, and key operations. Filter available entries by entity type, action, user, and date. It is not a complete recording of every read or mutation.
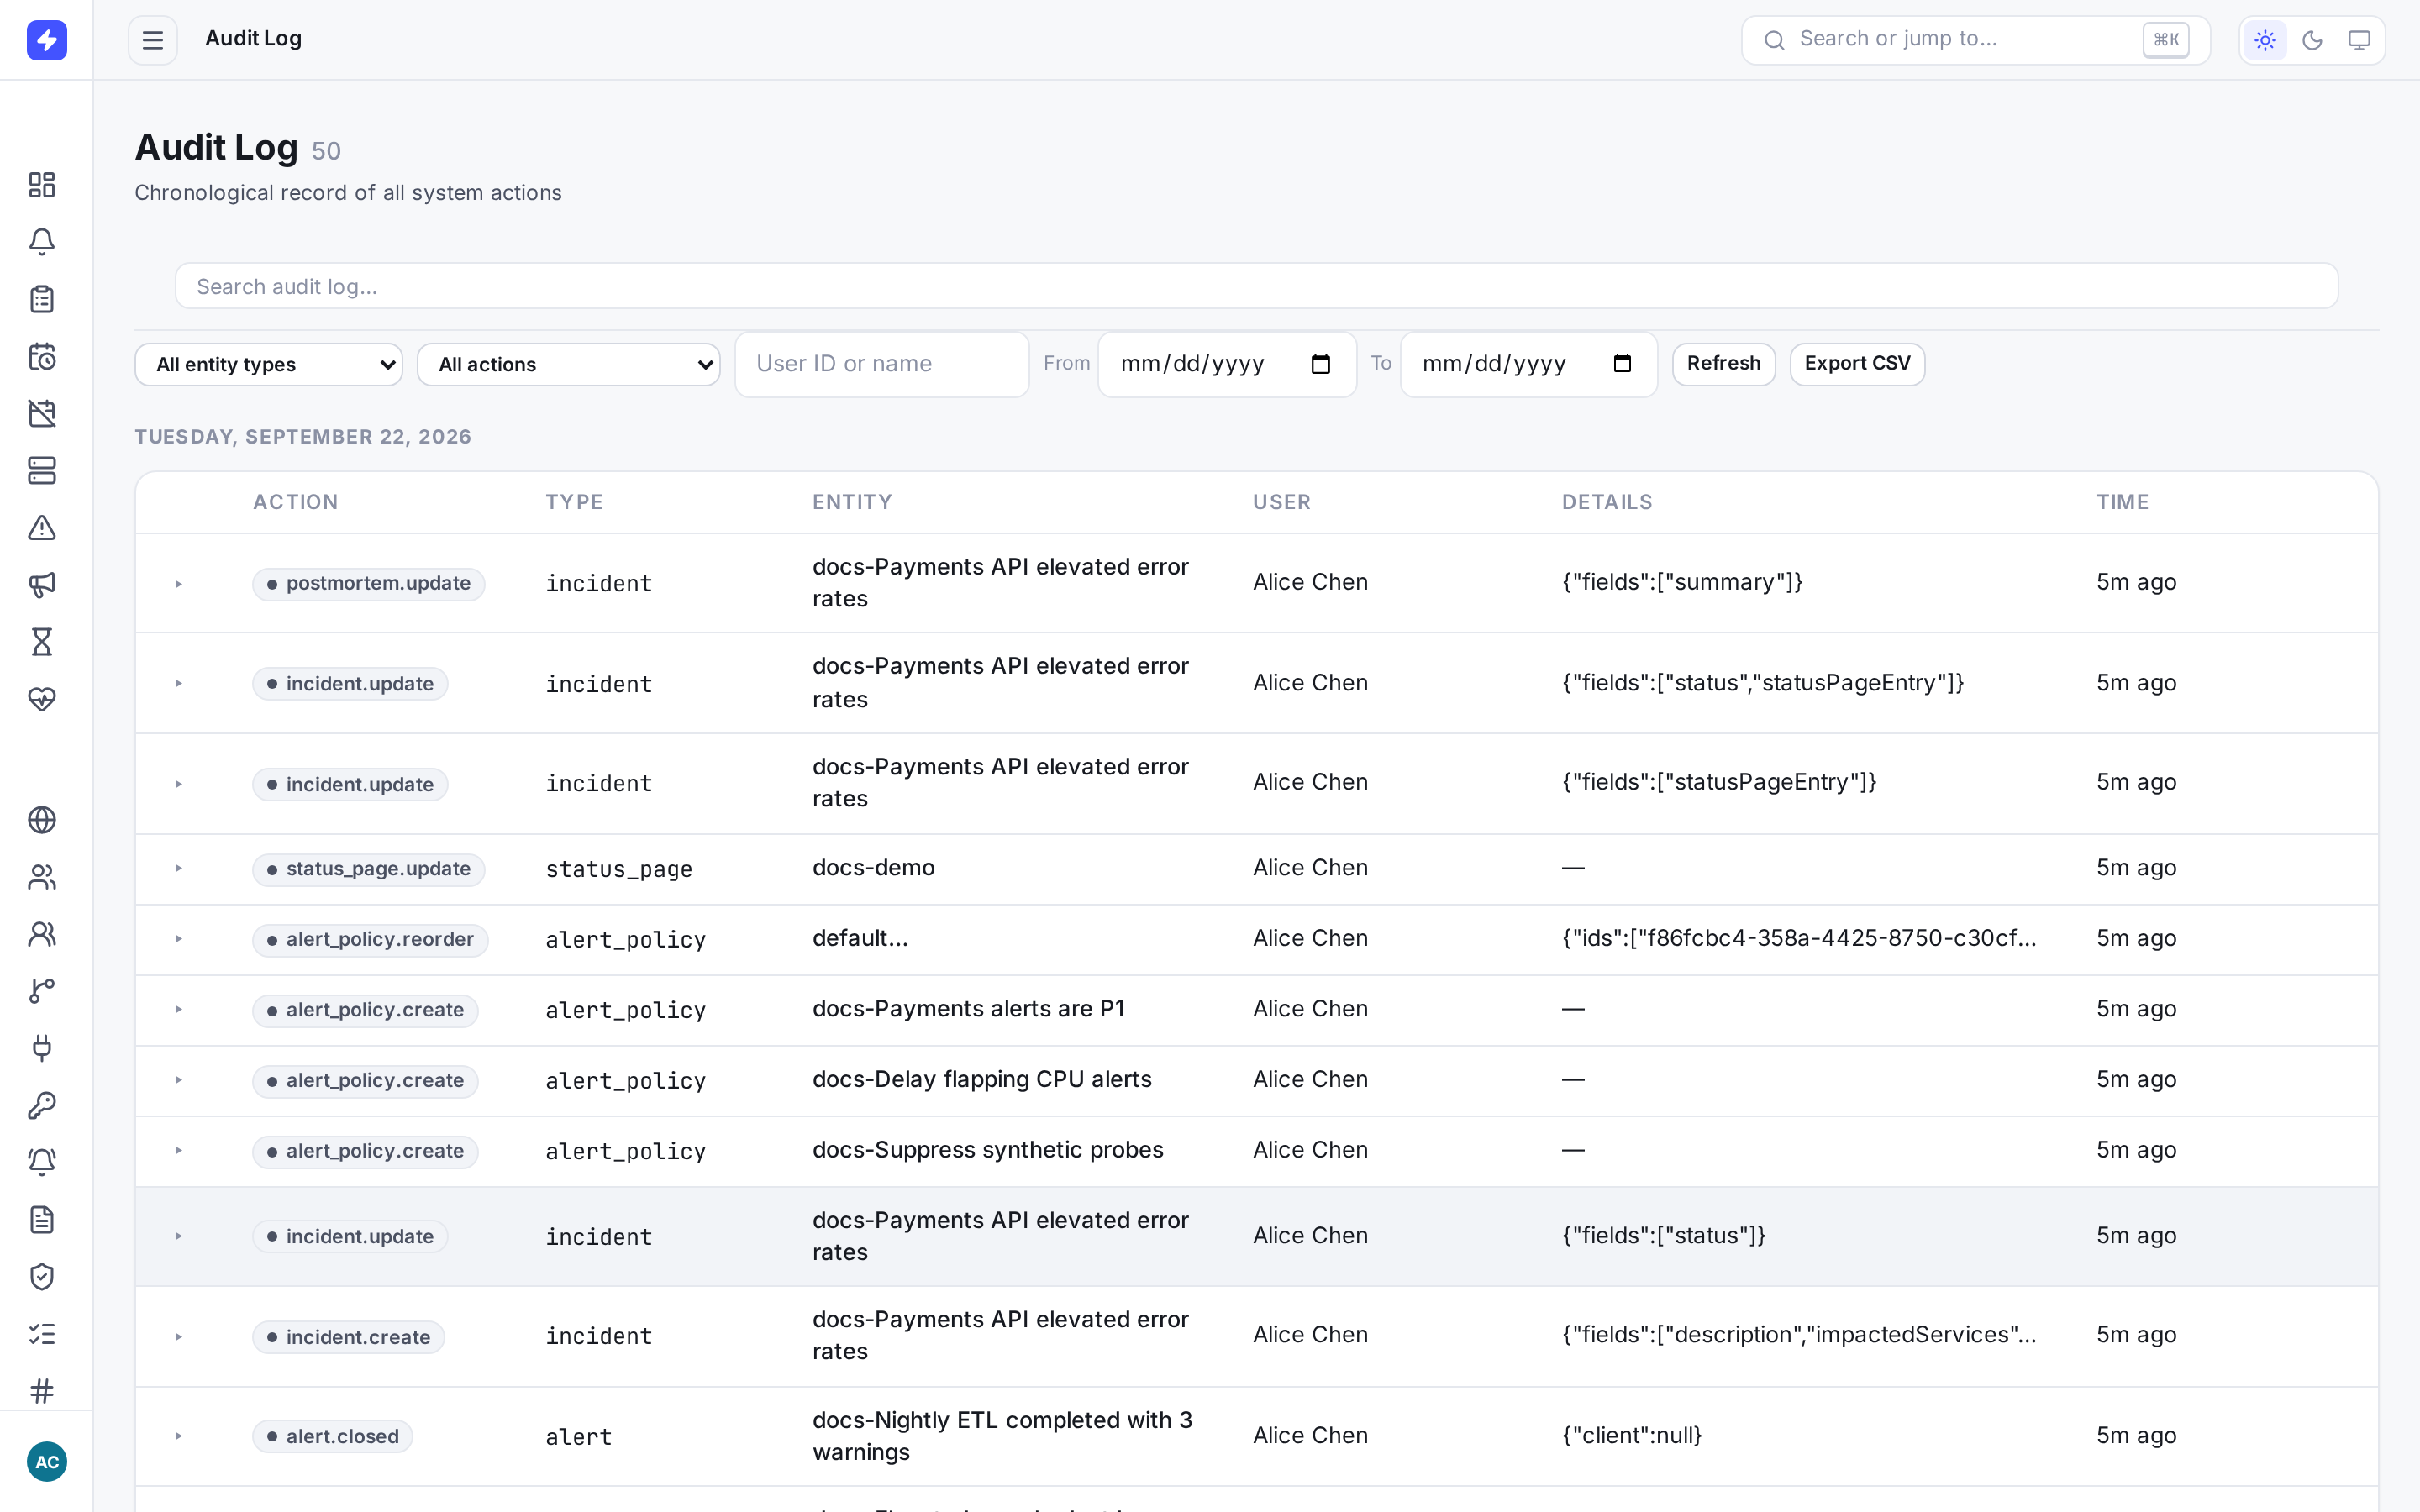
Use the audit log for recorded operational and security events; do not treat it as a universal activity recording. -
Granting support access
OpsPing has zero standing access — staff can't read your alerts unless you let them in. When you need hands-on help from OpsPing support:
- Invite support@opsping.com through the normal invite flow, with the least role needed for the task (usually user; admin only when the problem itself is administrative).
- Support works the issue inside your organization. Review the audit entries that OpsPing records for the support account, while recognizing that not every read or mutation is logged.
- When the issue is resolved, delete or block the support user. Access ends immediately.
- Review the available audit entries and any incident notes or change records used during the work.
NoteSupport holds no standing access between invitations — revoking the user returns you to a state where no one outside your organization can see your data.
-
Measure response with reports
Reports & Analytics turns the alert history into numbers: volume trends, MTTA/MTTR, and breakdowns by priority, team, and source — with CSV/PDF export for the review meeting. Reports are team-scoped: admins see every team, regular users see their own.
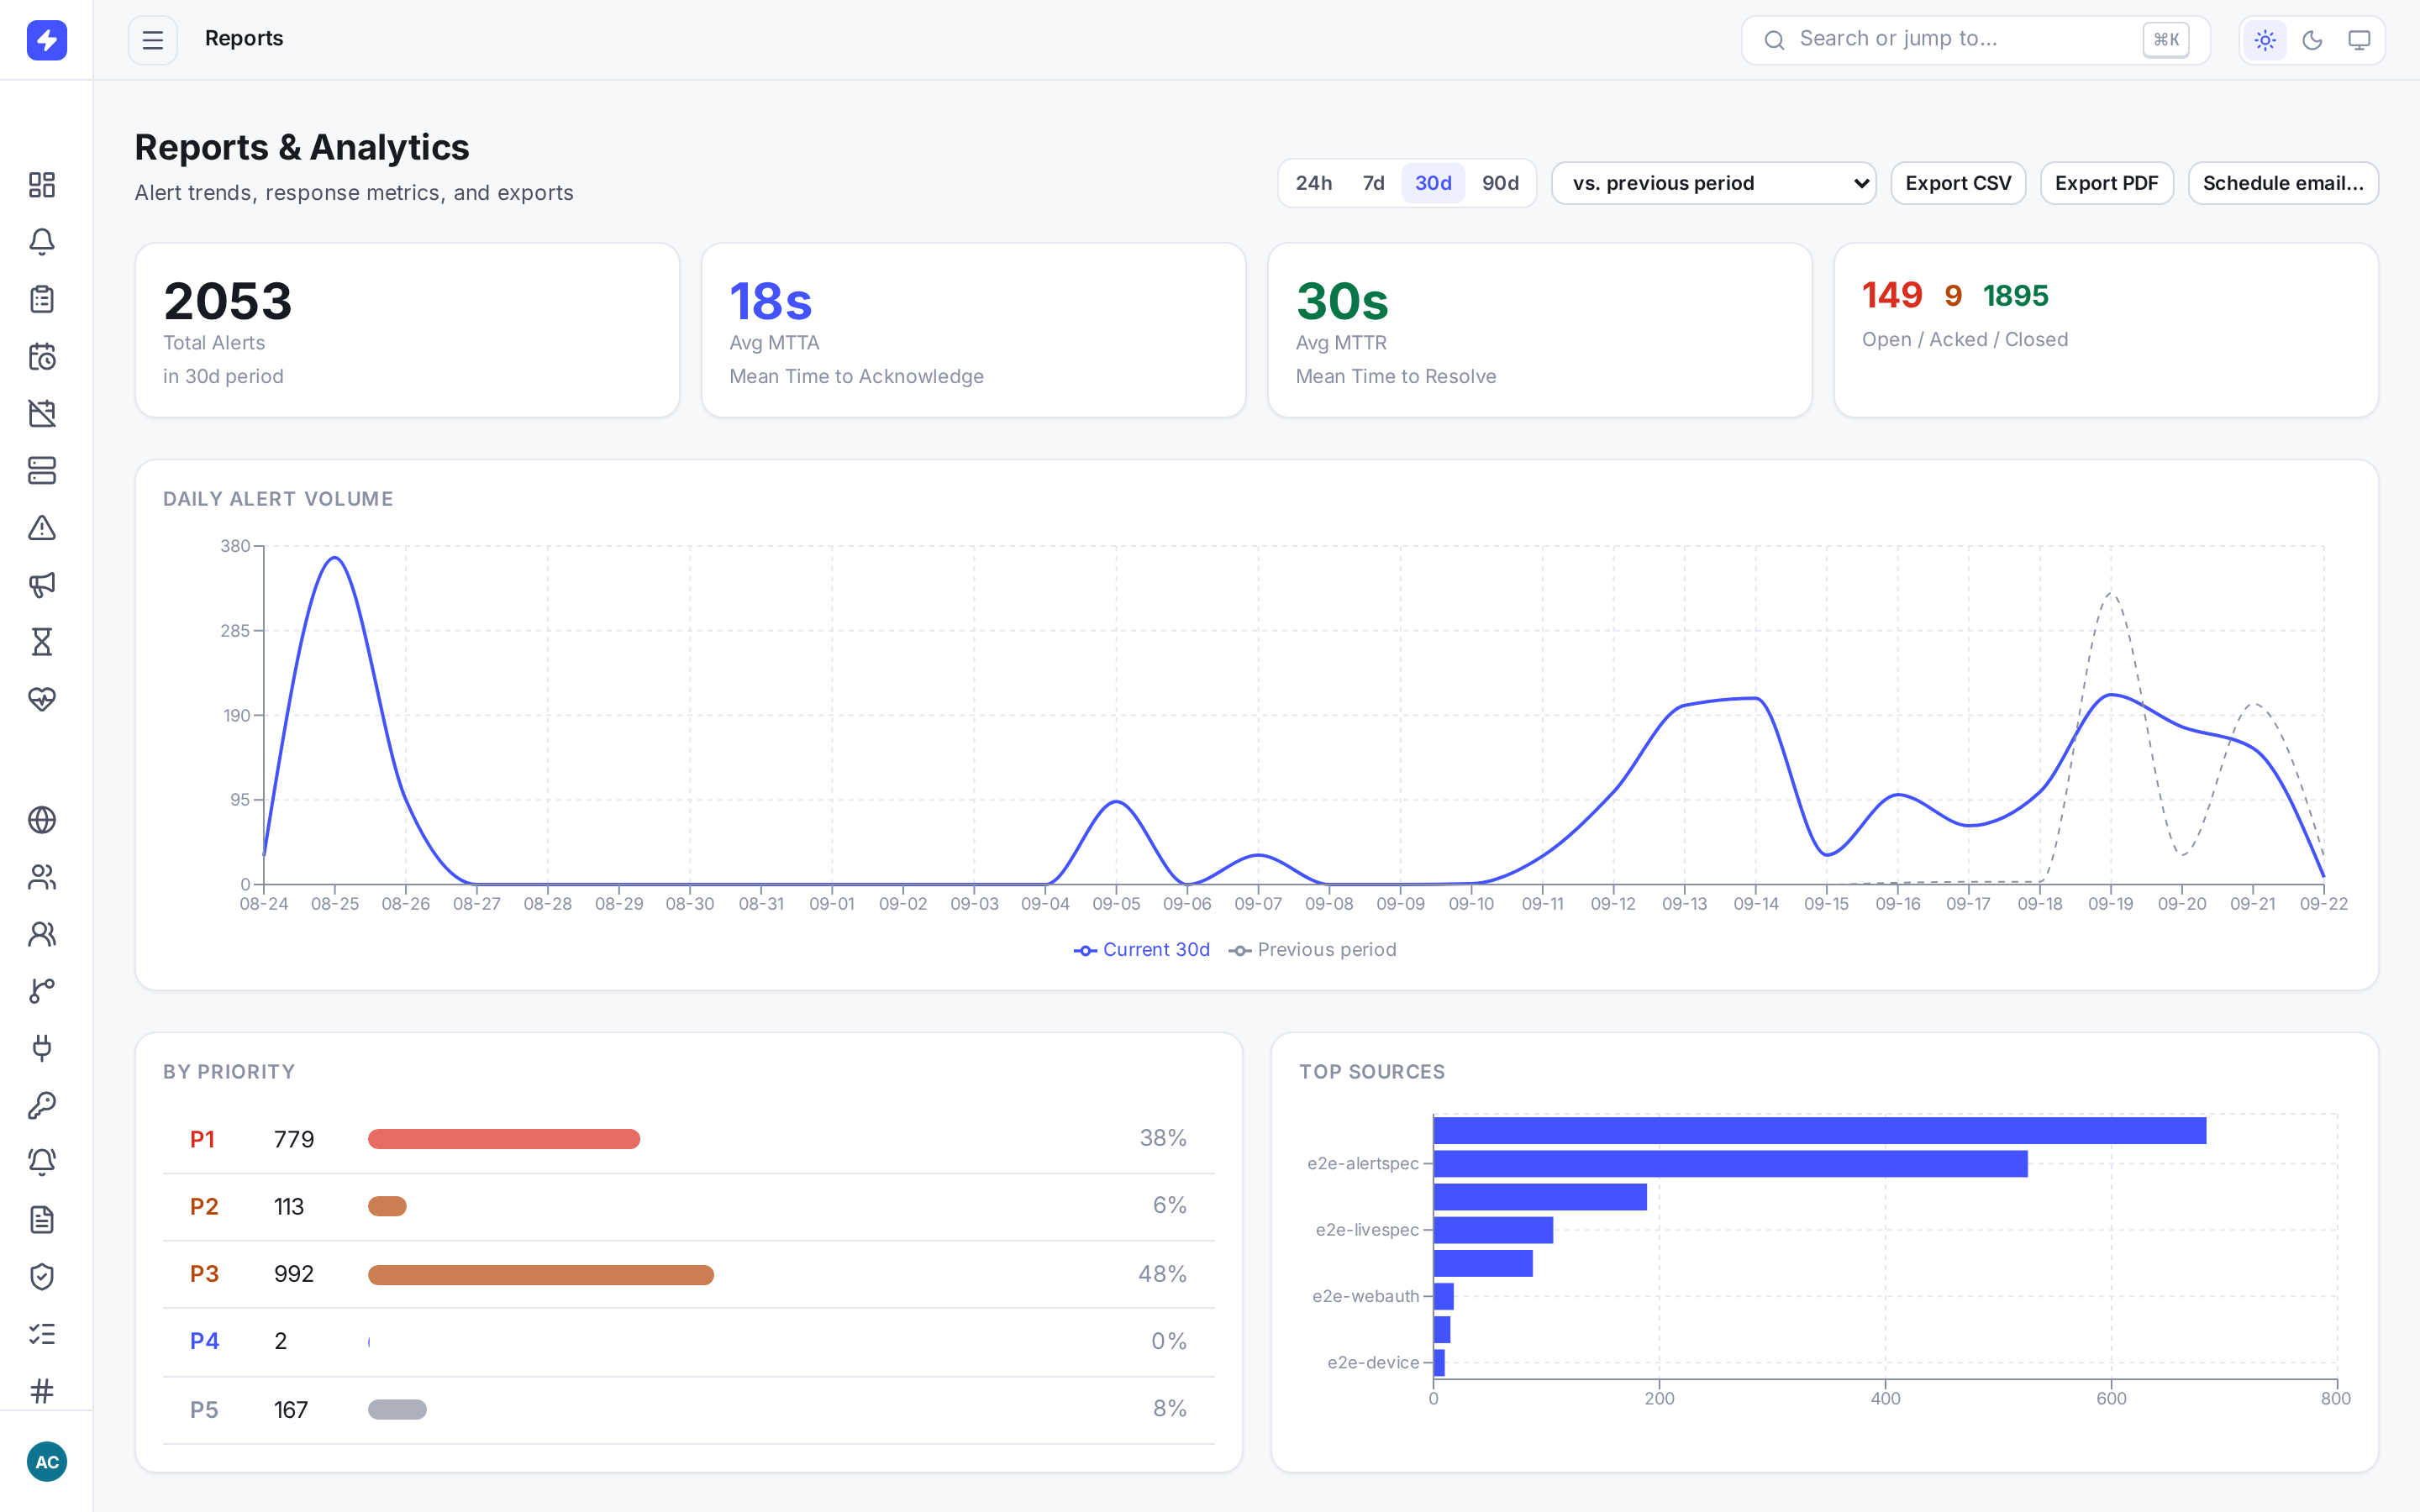
Reports & Analytics: alert volume trends, MTTA/MTTR, breakdowns by priority, team, and source, with CSV/PDF export. -
Configure the account in settings
Settings displays account information and provides security, session-timeout, setup-guide, and mobile-pairing controls. Admins configure OIDC for a selected team. Use Users → Notify to edit a user's notification preferences.
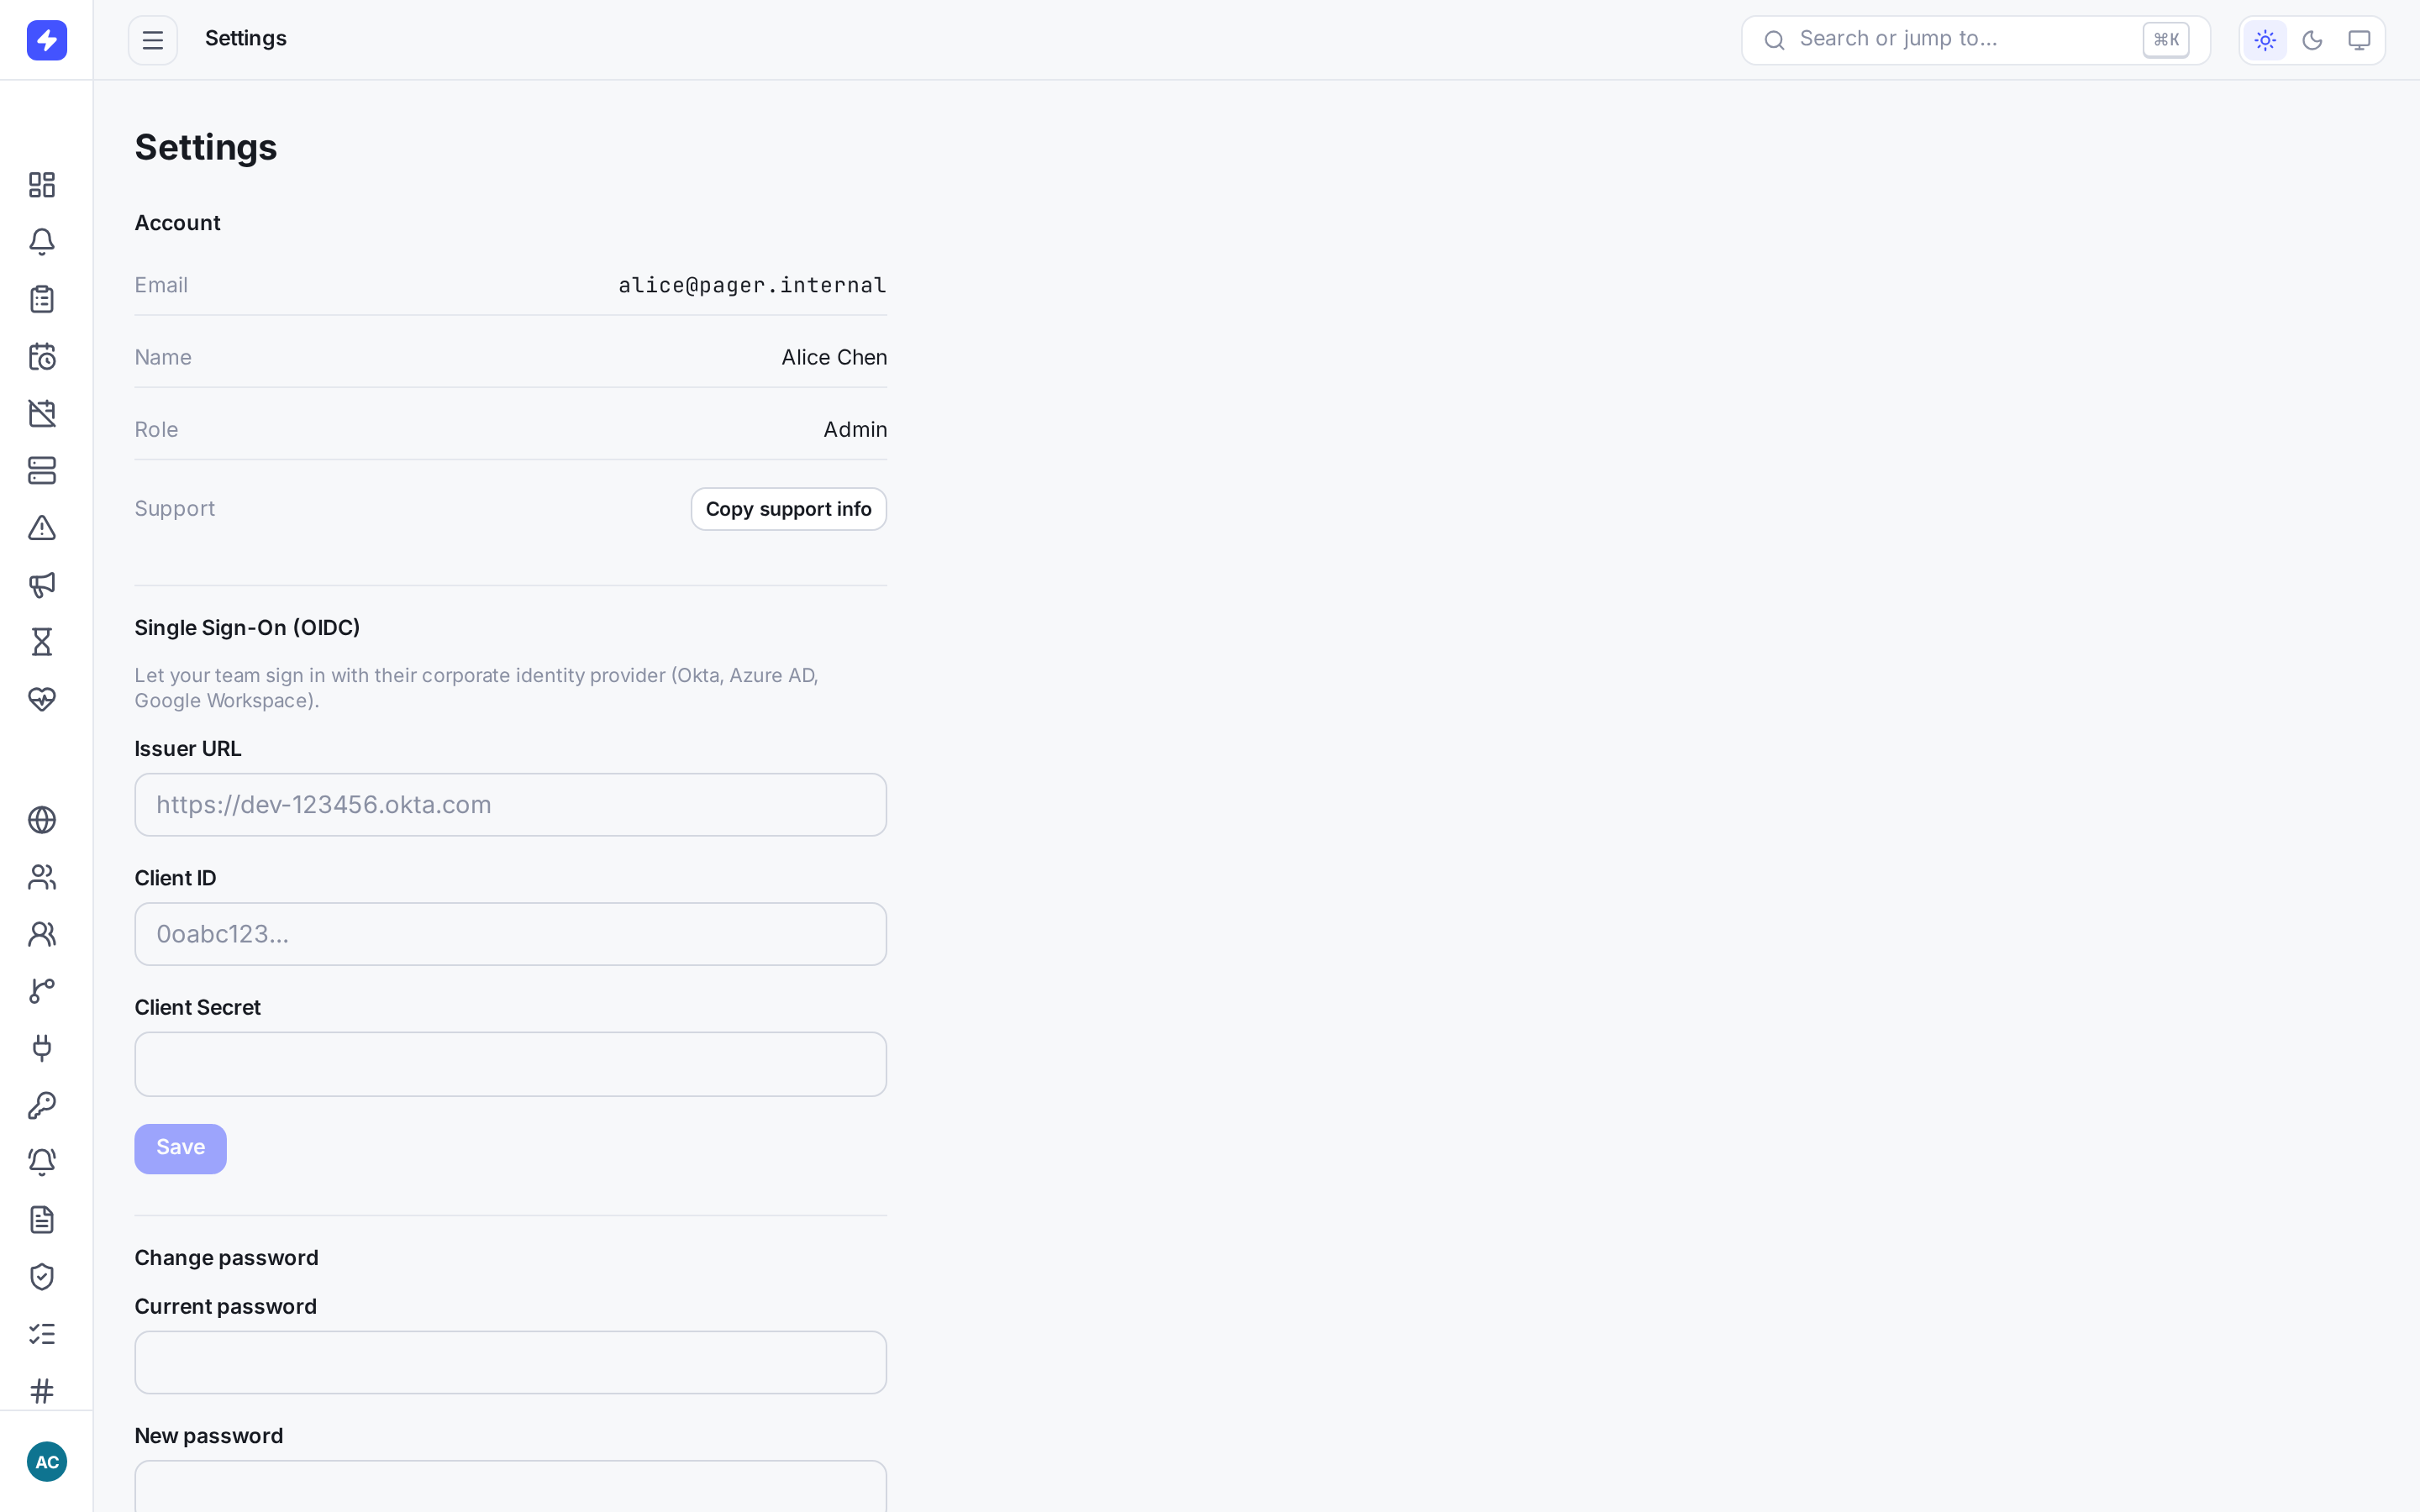
Settings groups session, security, setup, pairing, and team-scoped SSO controls. -
Move fast with the command palette
Press Cmd/Ctrl+K anywhere in the console to open the command palette: jump to any page, or search straight into alerts and users. During an incident it's the fastest path from anywhere to the alert detail you need.
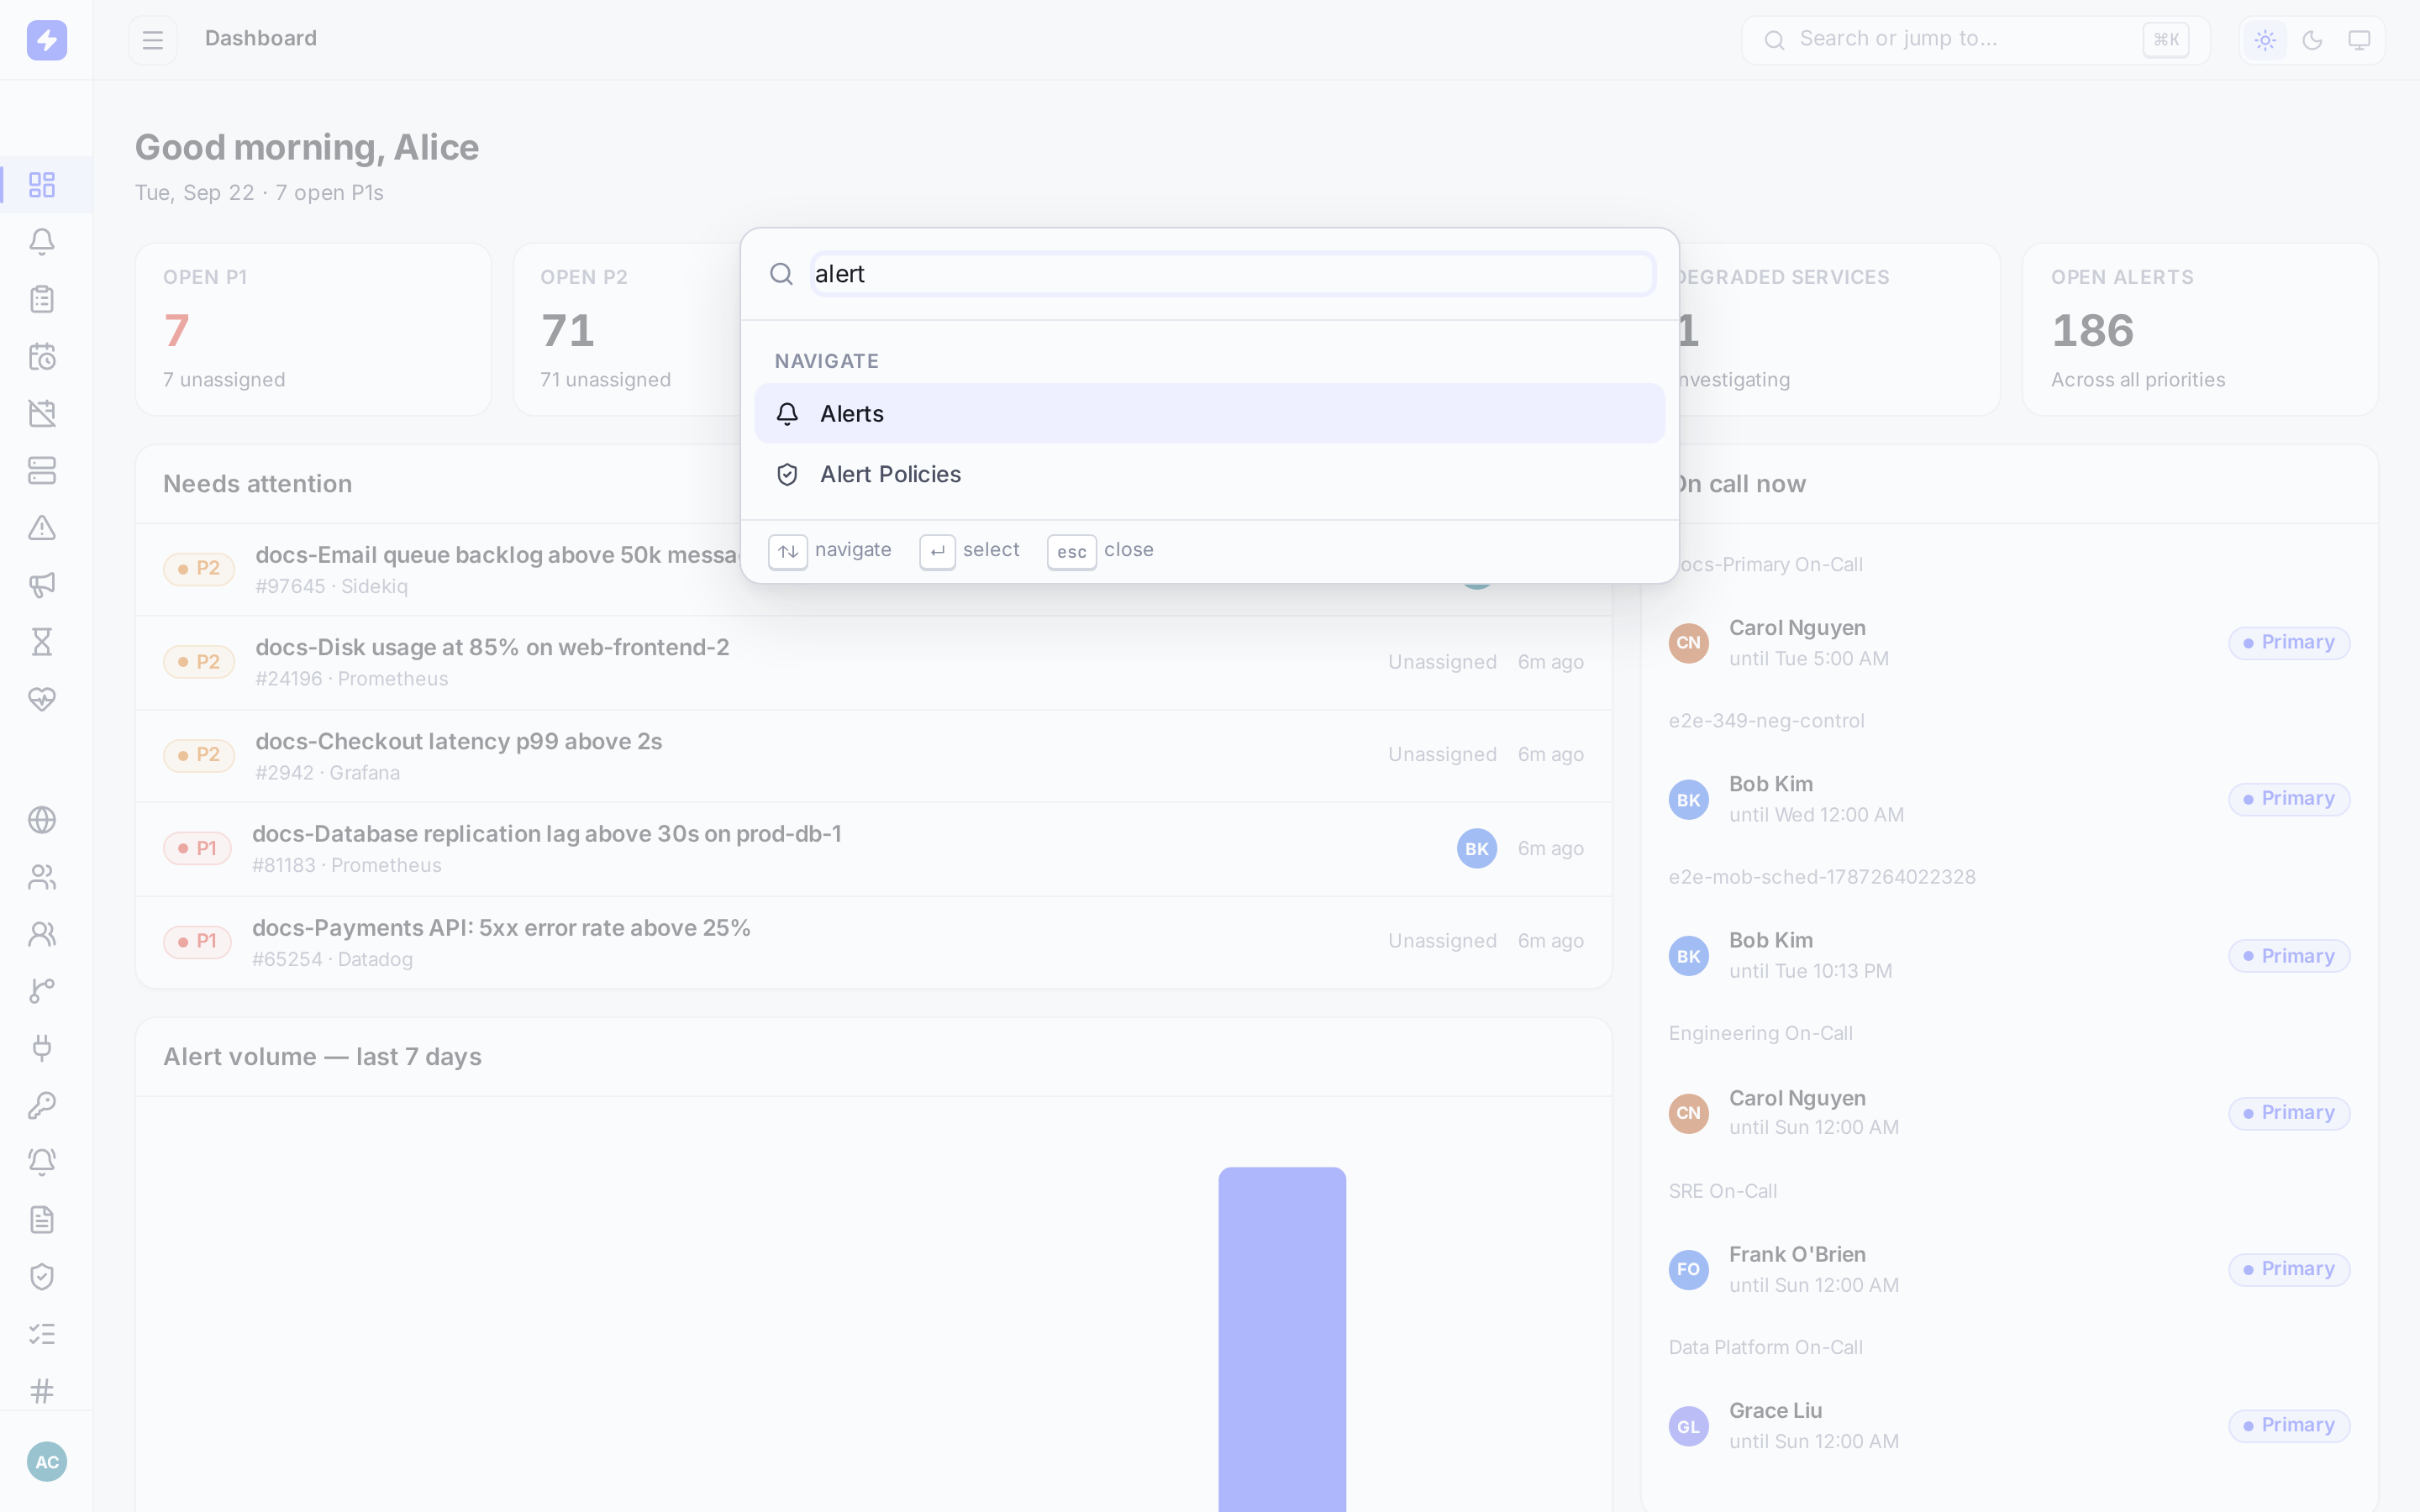
Press Cmd/Ctrl+K anywhere to jump to pages, alerts, and users from the command palette. -
Understand team scoping
Non-admins see resources belonging to any of their teams plus global resources. They cannot use All teams to bypass access. Admins already have workspace-wide visibility; the Alerts toggle changes that list view, not authorization.
TipIf data appears missing, have an admin check the resource's team assignment and the user's memberships.